资源
正文
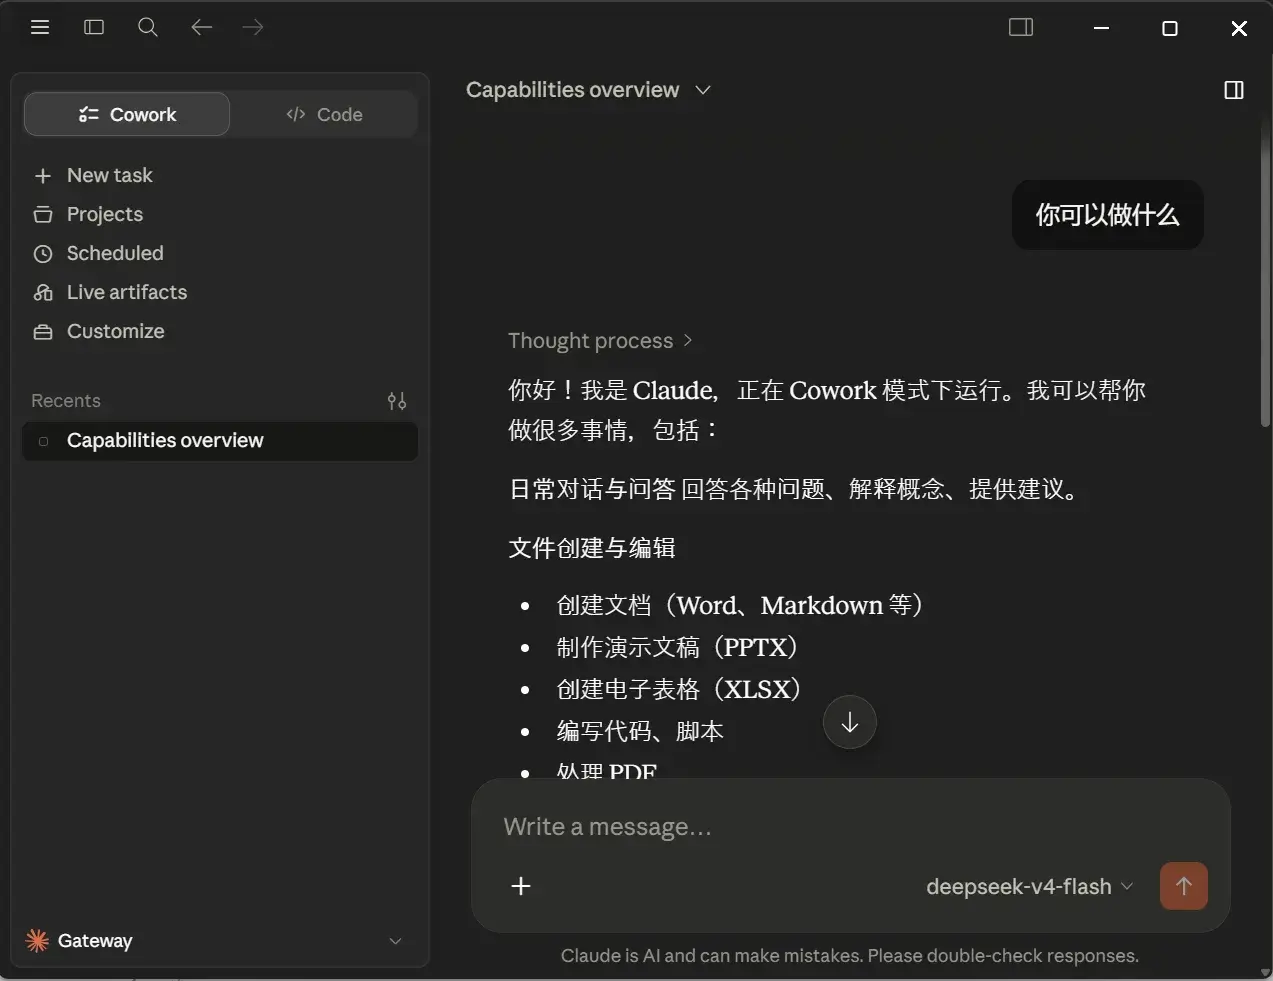
Deepseek API
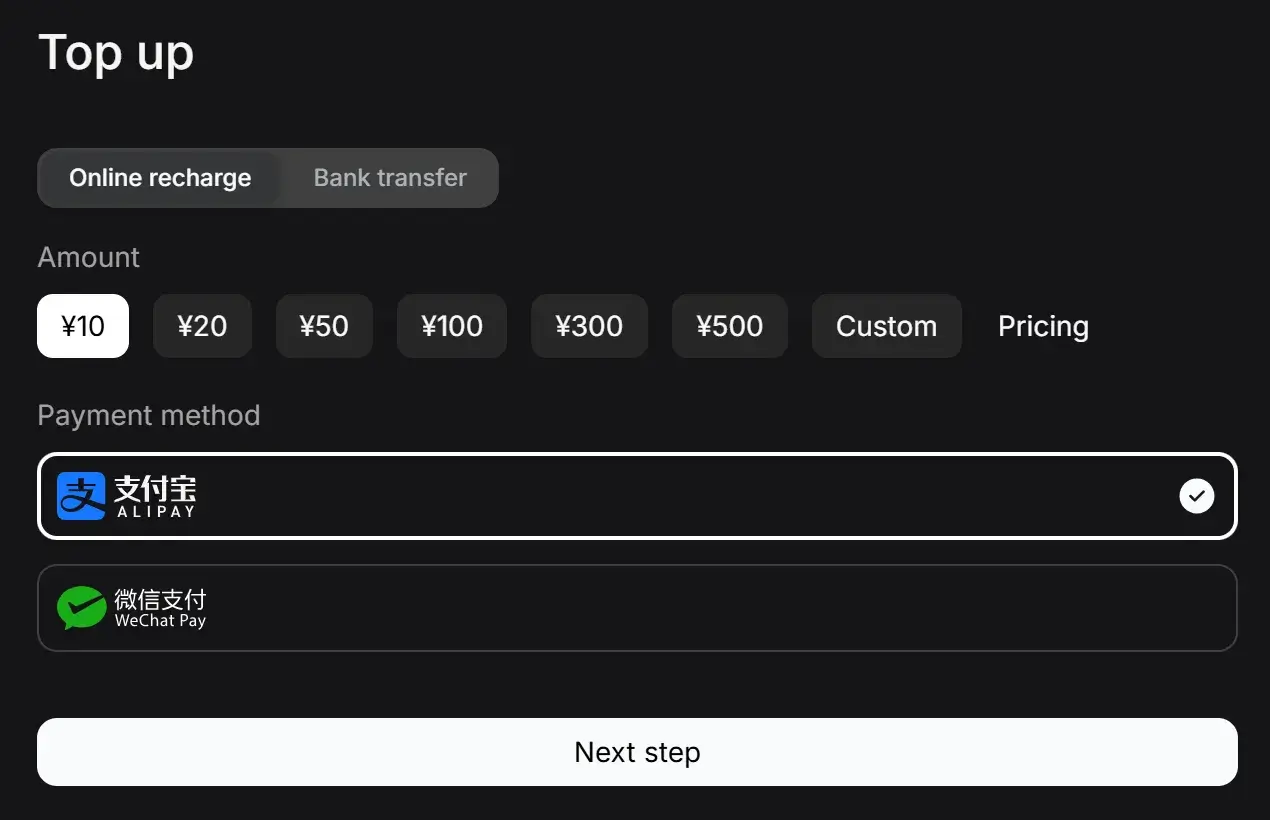
先从 DeepSeek Platform 处买一点 Token。
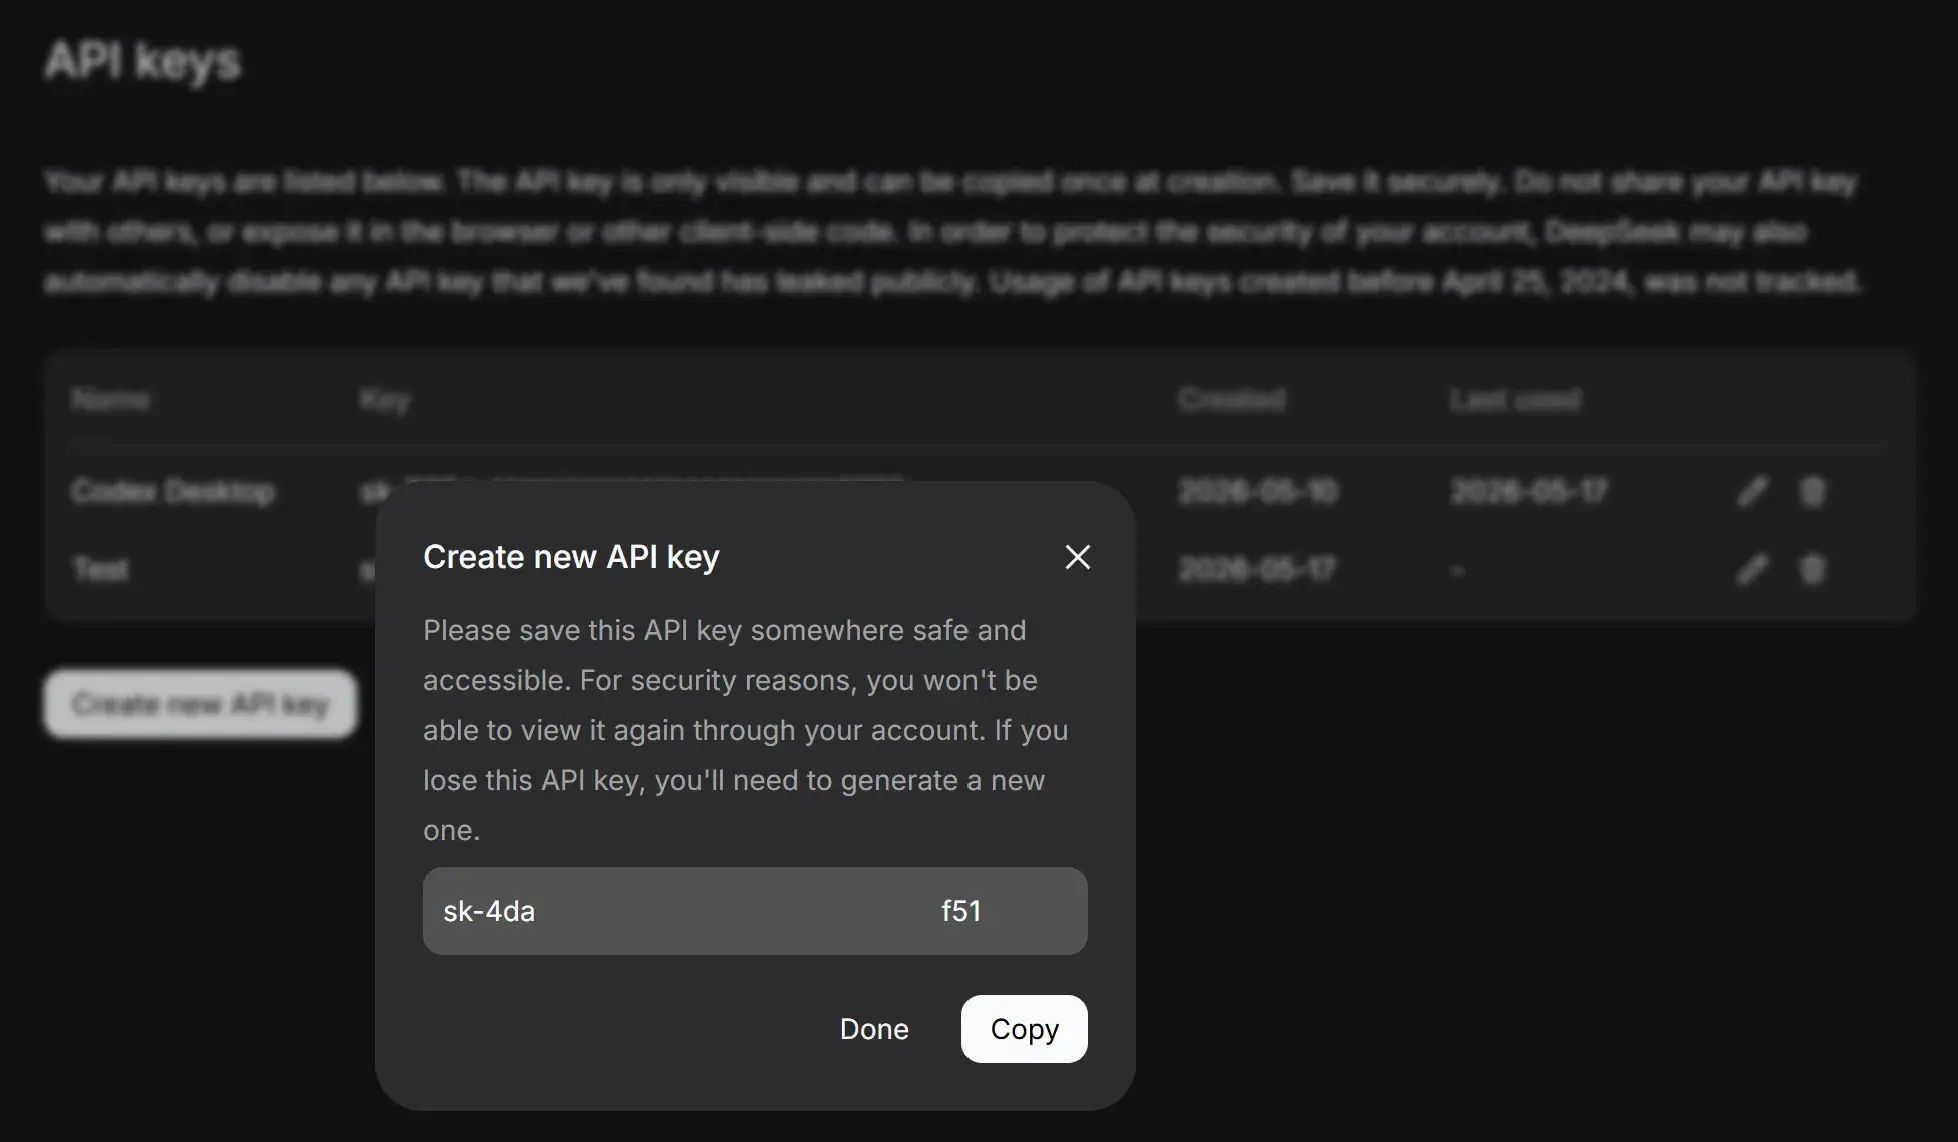
整一个 OpenAI 形式的 API Key(以 sk- 开头):
参考 API 文档(Your First API Call | DeepSeek API Docs)目前可提供的模型有:
| PARAM | VALUE |
|---|---|
| base_url (OpenAI) | https://api.deepseek.com |
| base_url (Anthropic) | https://api.deepseek.com/anthropic |
| api_key | apply for an API key |
| model* | deepseek-v4-flash deepseek-v4-pro deepseek-chat (to be deprecated on 2026/07/24) deepseek-reasoner (to be deprecated on 2026/07/24) |
CC Switch
从 Releases · farion1231/cc-switch 下载并安装以管理各个 Agent。
Python 调用
from openai import OpenAI

client = OpenAI(
    api_key="sk-xxxxxxxx",
    base_url="https://api.deepseek.com"
)

response = client.chat.completions.create(
    model="deepseek-chat",
    messages=[
        {
            "role": "user",
            "content": "河北大学在哪里?"
        }
    ]
)

print(response.choices[0].message.content)河北大学位于**河北省保定市**。具体有两个主要校区:
1. **五四路校区(校本部/老校区)**:地址为保定市莲池区五四东路180号。
2. **七一路校区(新校区)**:地址为保定市莲池区七一东路2666号。
此外,学校还有裕华路校区(医学部)。河北大学的办学主体和主要教学科研活动主要集中在五四路校区和七一路校区。Powershell 环境变量
在 Powershell 中将 API Key 记录。
如此设置只对当前会话有效:
$env:OPENAI_API_KEY="sk-xxxx"系统环境变量设置,这将持续有效:
setx OPENAI_API_KEY "sk-xxxx"使用 api_key=os.getenv("OPENAI_API_KEY") 获取对应环境变量的 API Key。即可防止将 API Key 泄露在代码中:

简单的 Agent
如果在目前的环境直接问“现在几点?”将得不到有效答复:
抱歉,我无法直接获取当前的实时时间。如果你需要知道现在的具体时间,可以查看设备上的时钟显示(比如手机、电脑或手表)。如果有其他问题,欢迎随时问我! 😊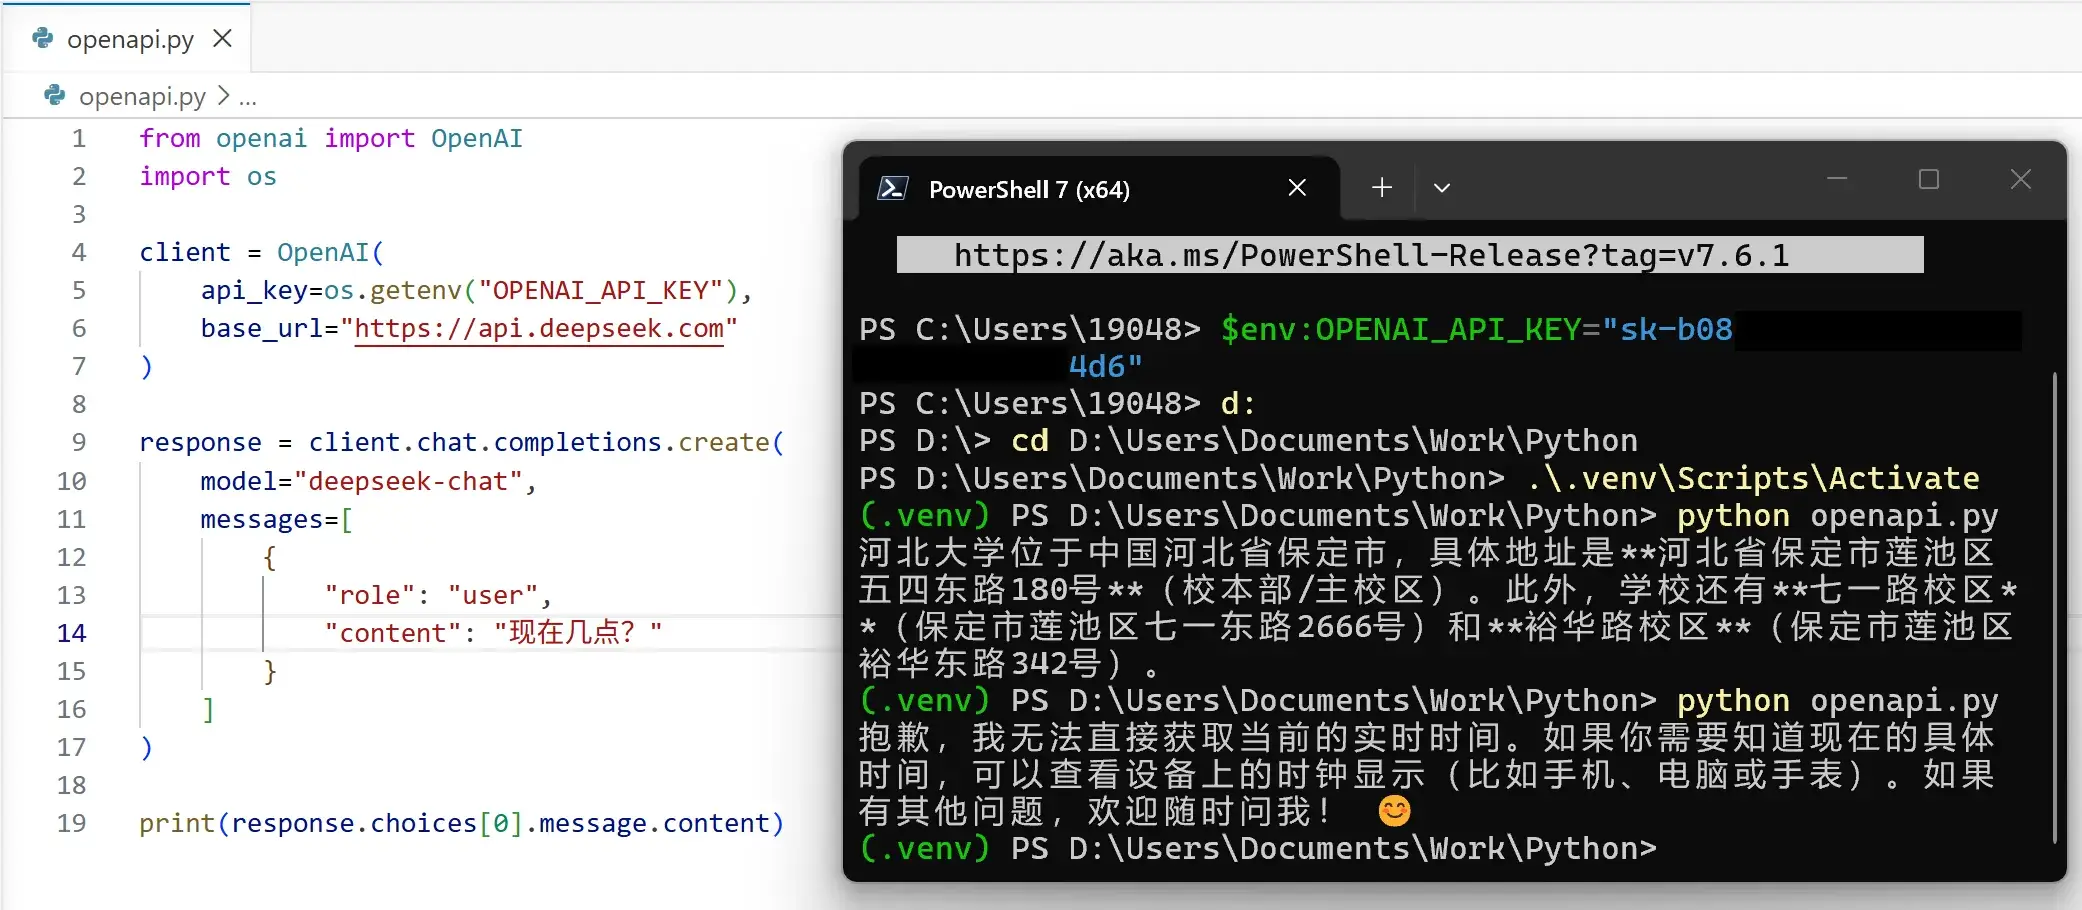
让 LLM 能够调用代码里的函数:
- 限定严格的提示词:提示词工程(Prompt Engineering) | 菜鸟教程
import os
import json
from openai import OpenAI
from datetime import datetime

# =========================
# 1. Client(DeepSeek / OpenAI)
# =========================
client = OpenAI(
    api_key=os.getenv("OPENAI_API_KEY"),
    base_url="https://api.deepseek.com"
)

# =========================
# 2. Tools
# =========================

def get_time():
    return datetime.now().strftime("%Y-%m-%d %H:%M:%S")


def calculator(expression: str):
    try:
        return str(eval(expression))
    except Exception as e:
        return f"error: {str(e)}"


TOOLS = {
    "get_time": get_time,
    "calculator": calculator,
}

# =========================
# 3. System Prompt
# =========================

SYSTEM_PROMPT = """
你是一个工具调用型 Agent。

你必须严格输出 JSON,不能输出任何多余文本。

输出格式只有两种:

1. 调用工具:
{
  "action": "tool",
  "name": "tool_name",
  "args": {}
}

2. 最终回答:
{
  "action": "final",
  "answer": "xxx"
}

规则:
- 时间问题必须用 get_time
- 计算必须用 calculator
- 不允许编造工具结果
"""

# =========================
# 4. Agent Loop
# =========================

def run_agent(user_input: str):
    messages = [
        {"role": "system", "content": SYSTEM_PROMPT},
        {"role": "user", "content": user_input}
    ]

    while True:
        resp = client.chat.completions.create(
            model="deepseek-chat",
            messages=messages,
            response_format={"type": "json_object"}
        )

        content = resp.choices[0].message.content
        print("\n[LLM raw output]", content)

        # -------------------------
        # parse JSON safely
        # -------------------------
        try:
            data = json.loads(content)
        except Exception:
            return "LLM output is not valid JSON"

        # =========================
        # TOOL CALL
        # =========================
        if data["action"] == "tool":
            tool_name = data["name"]
            args = data.get("args", {})

            print(f"[Tool call] {tool_name} {args}")

            tool_result = TOOLS[tool_name](**args)

            messages.append({
                "role": "assistant",
                "content": content
            })

            messages.append({
                "role": "user",
                "content": f"tool_result: {tool_result}"
            })

        # =========================
        # FINAL ANSWER
        # =========================
        else:
            return data["answer"]

# =========================
# 5. Run
# =========================

if __name__ == "__main__":
    while True:
        q = input("\nYou: ")
        if q.lower() in ["exit", "quit"]:
            break

        ans = run_agent(q)
print("\nAgent:", ans)You: What is the time now?
[LLM raw output] {"action": "tool", "name": "get_time", "args": {}}
[Tool call] get_time {}
[LLM raw output] {"action": "final", "answer": "The current time is 2026-05-17 10:25:08."}
Agent: The current time is 2026-05-17 10:25:08.Codex App
安装 Codex - Windows官方下载 | 微软应用商店 | Microsoft Store。然后从 Releases · BigPizzaV3/CodexPlusPlus 下载 Codex++ 并安装。得到 Codex++ 和 Codex++管理工具。在管理工具中配置好 API。
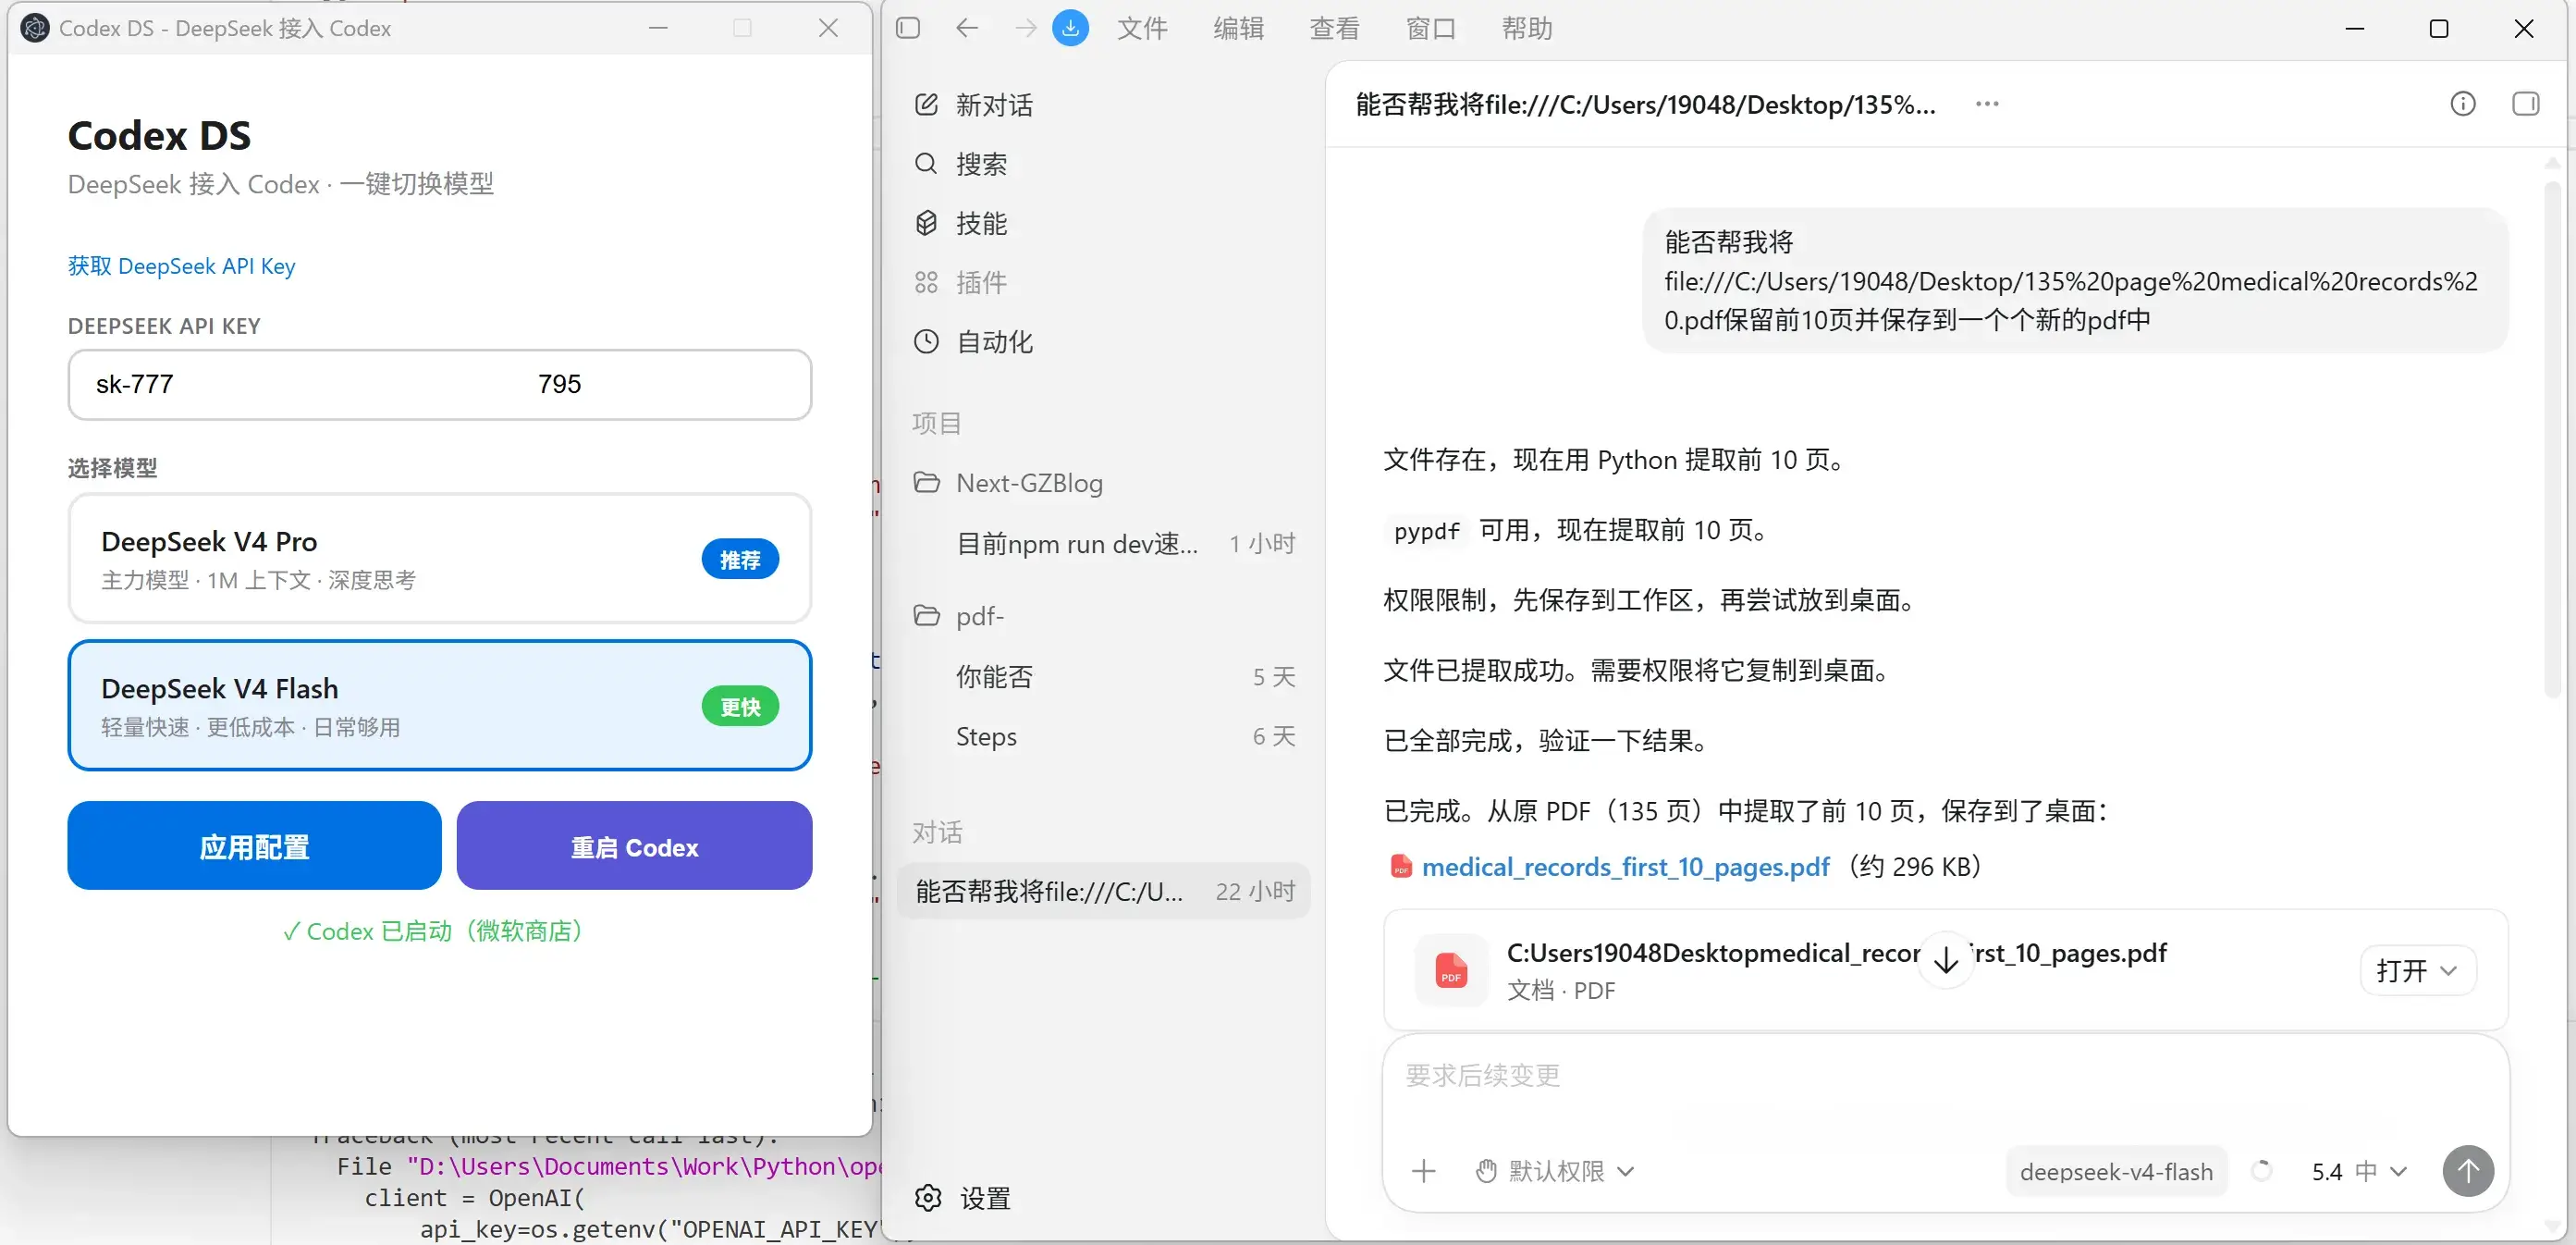
打开 Codex++ 即可开耍!插件也有效。
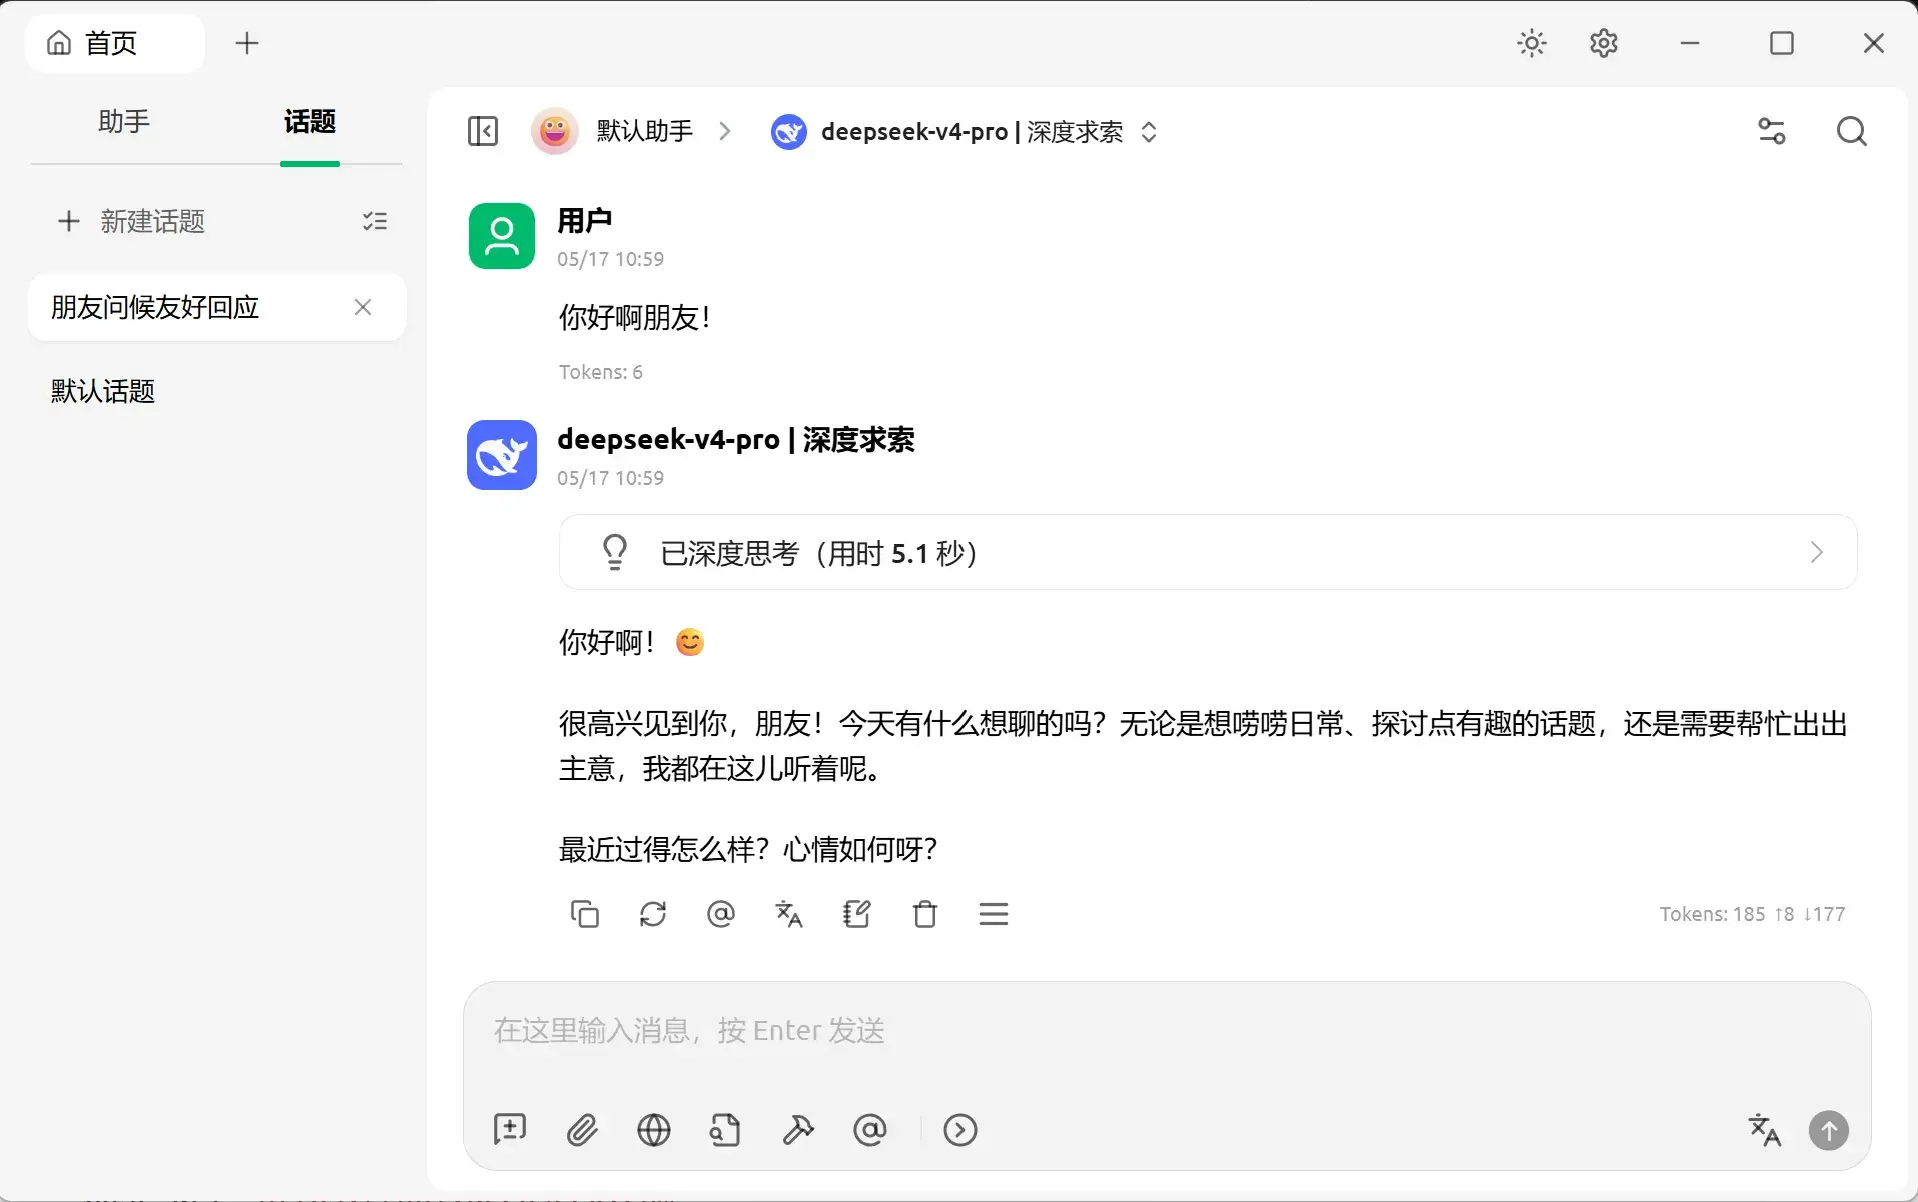
Cherry Studio
填好 API Key 和 Model 直接用:
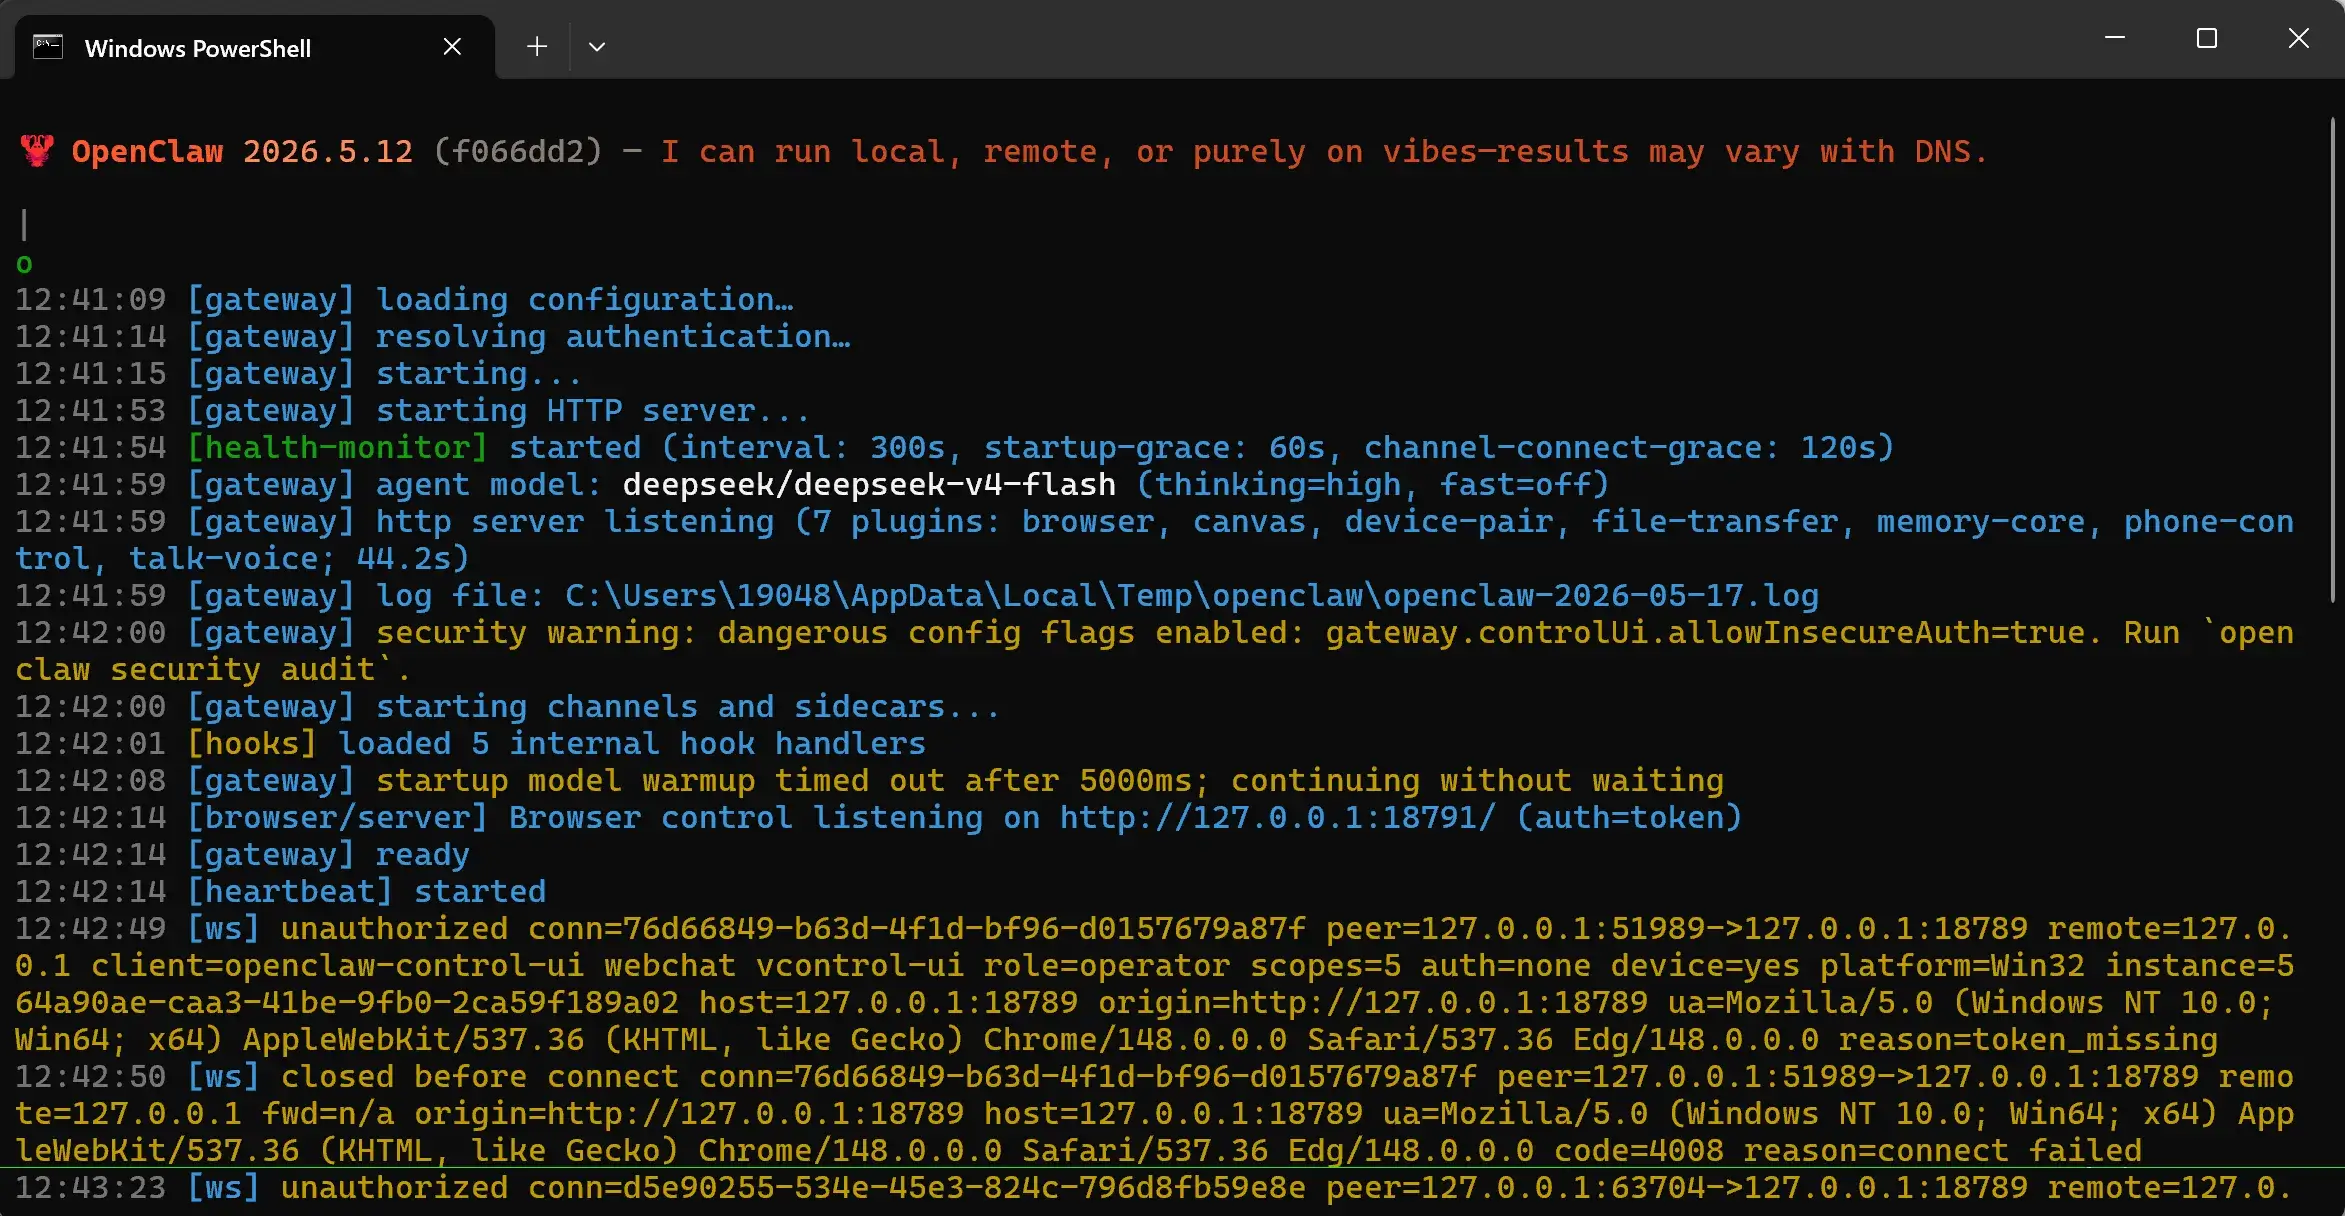
OpenClaw
这个好像租一个服务器,然后在服务器上搭比较合适。
Windows 下(管理员的 Powershell):
npm i -g openclaw
openclaw onboard
设置好,服务器将被启动:

启动客户端:
openclaw dashboard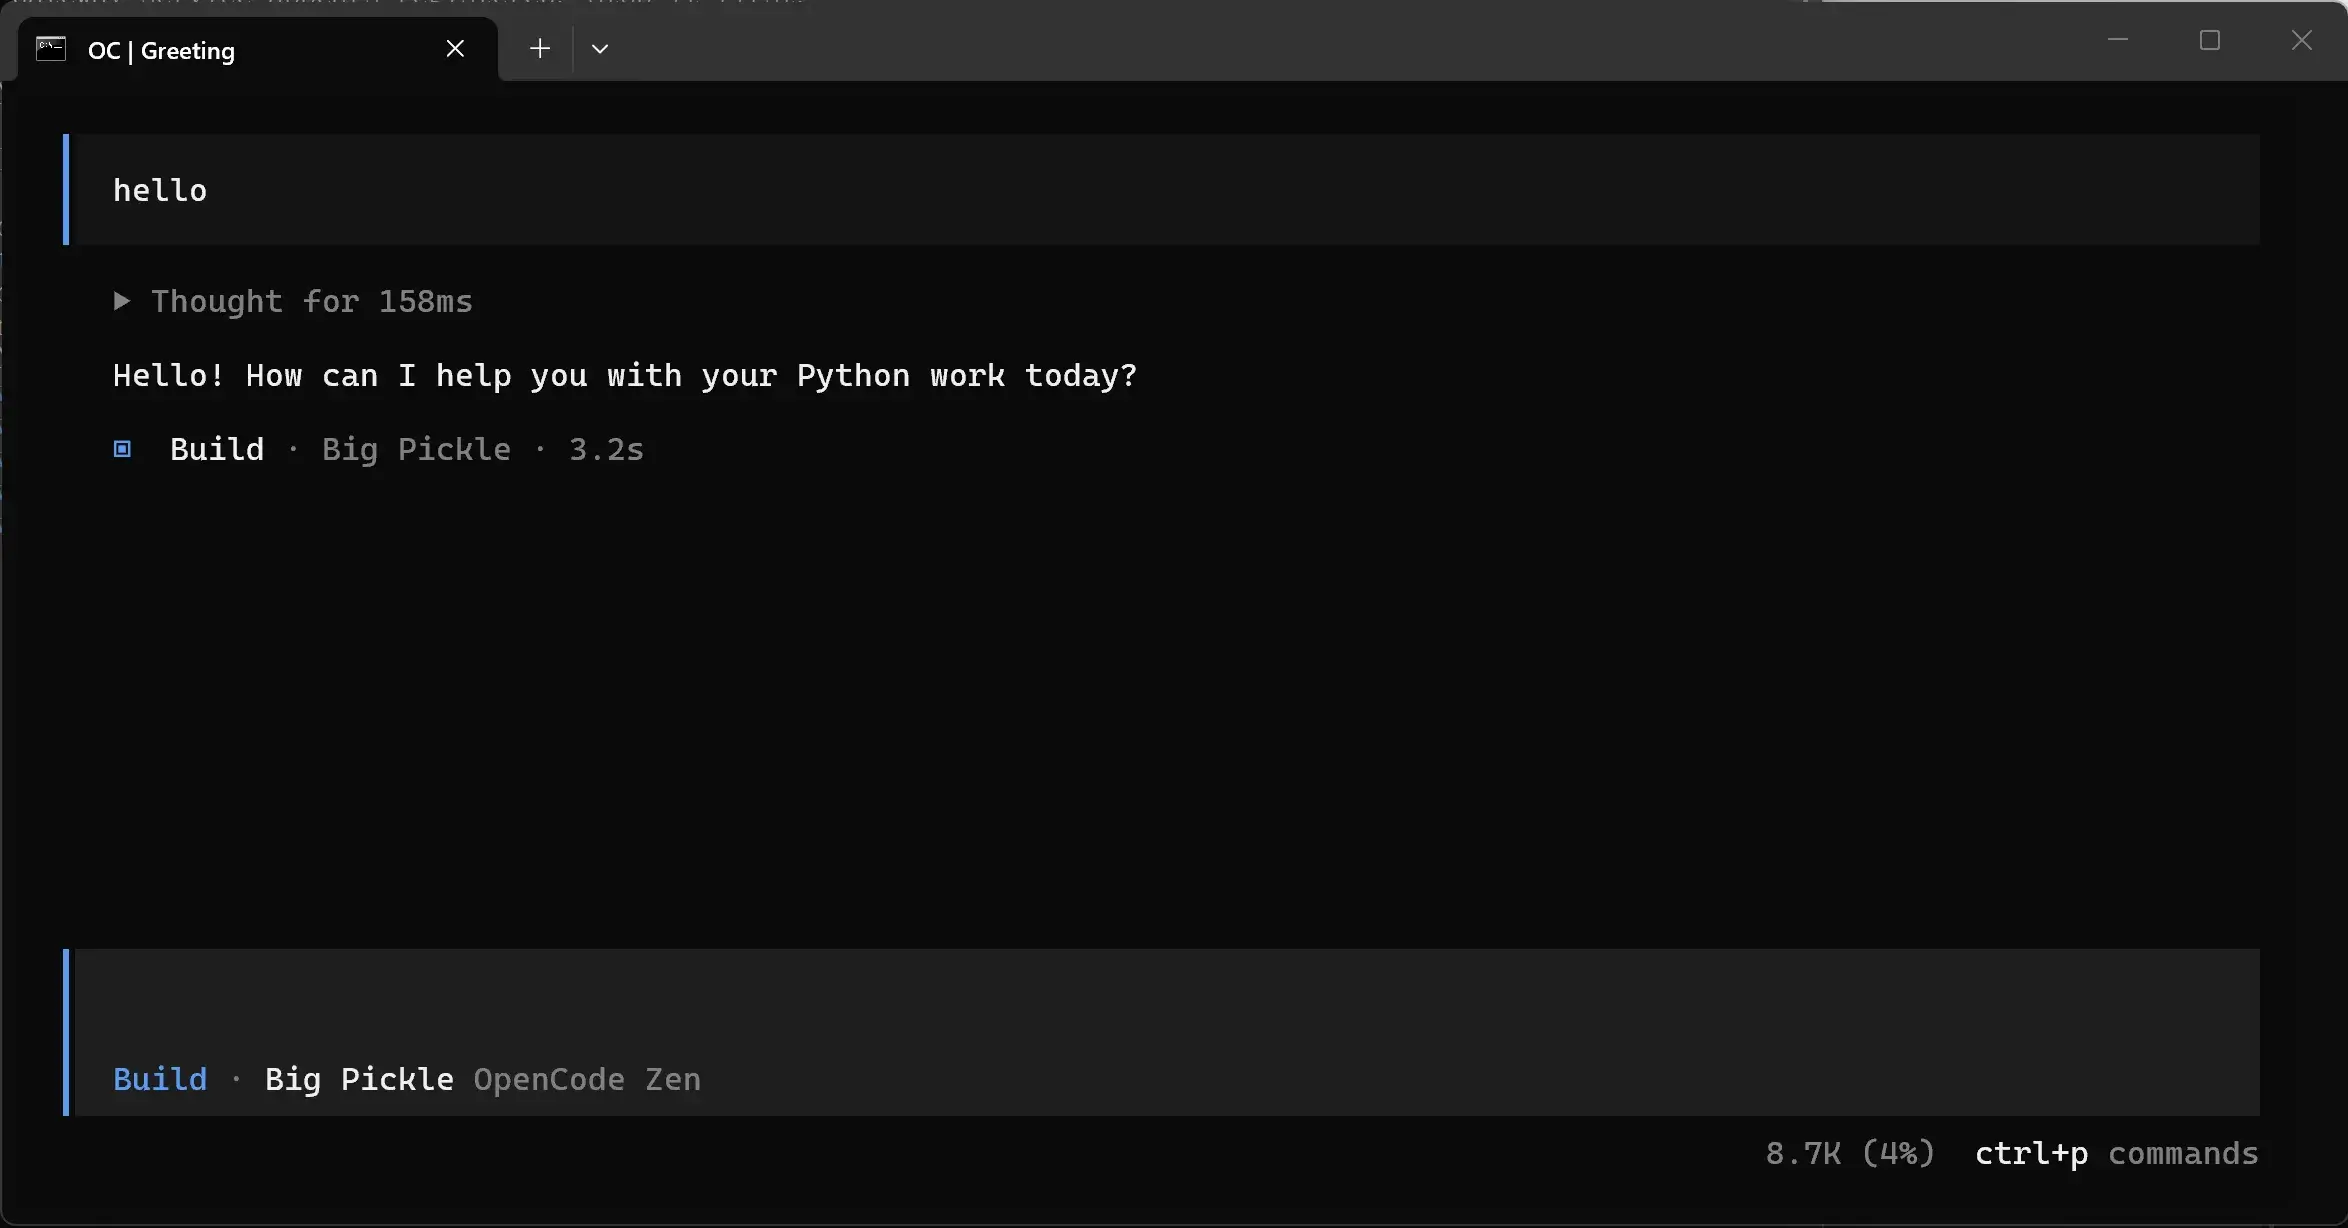
OpenCode
安装:
npm install -g opencode-ai启动:
opencode不需要 API Key 就能免费耍一耍:
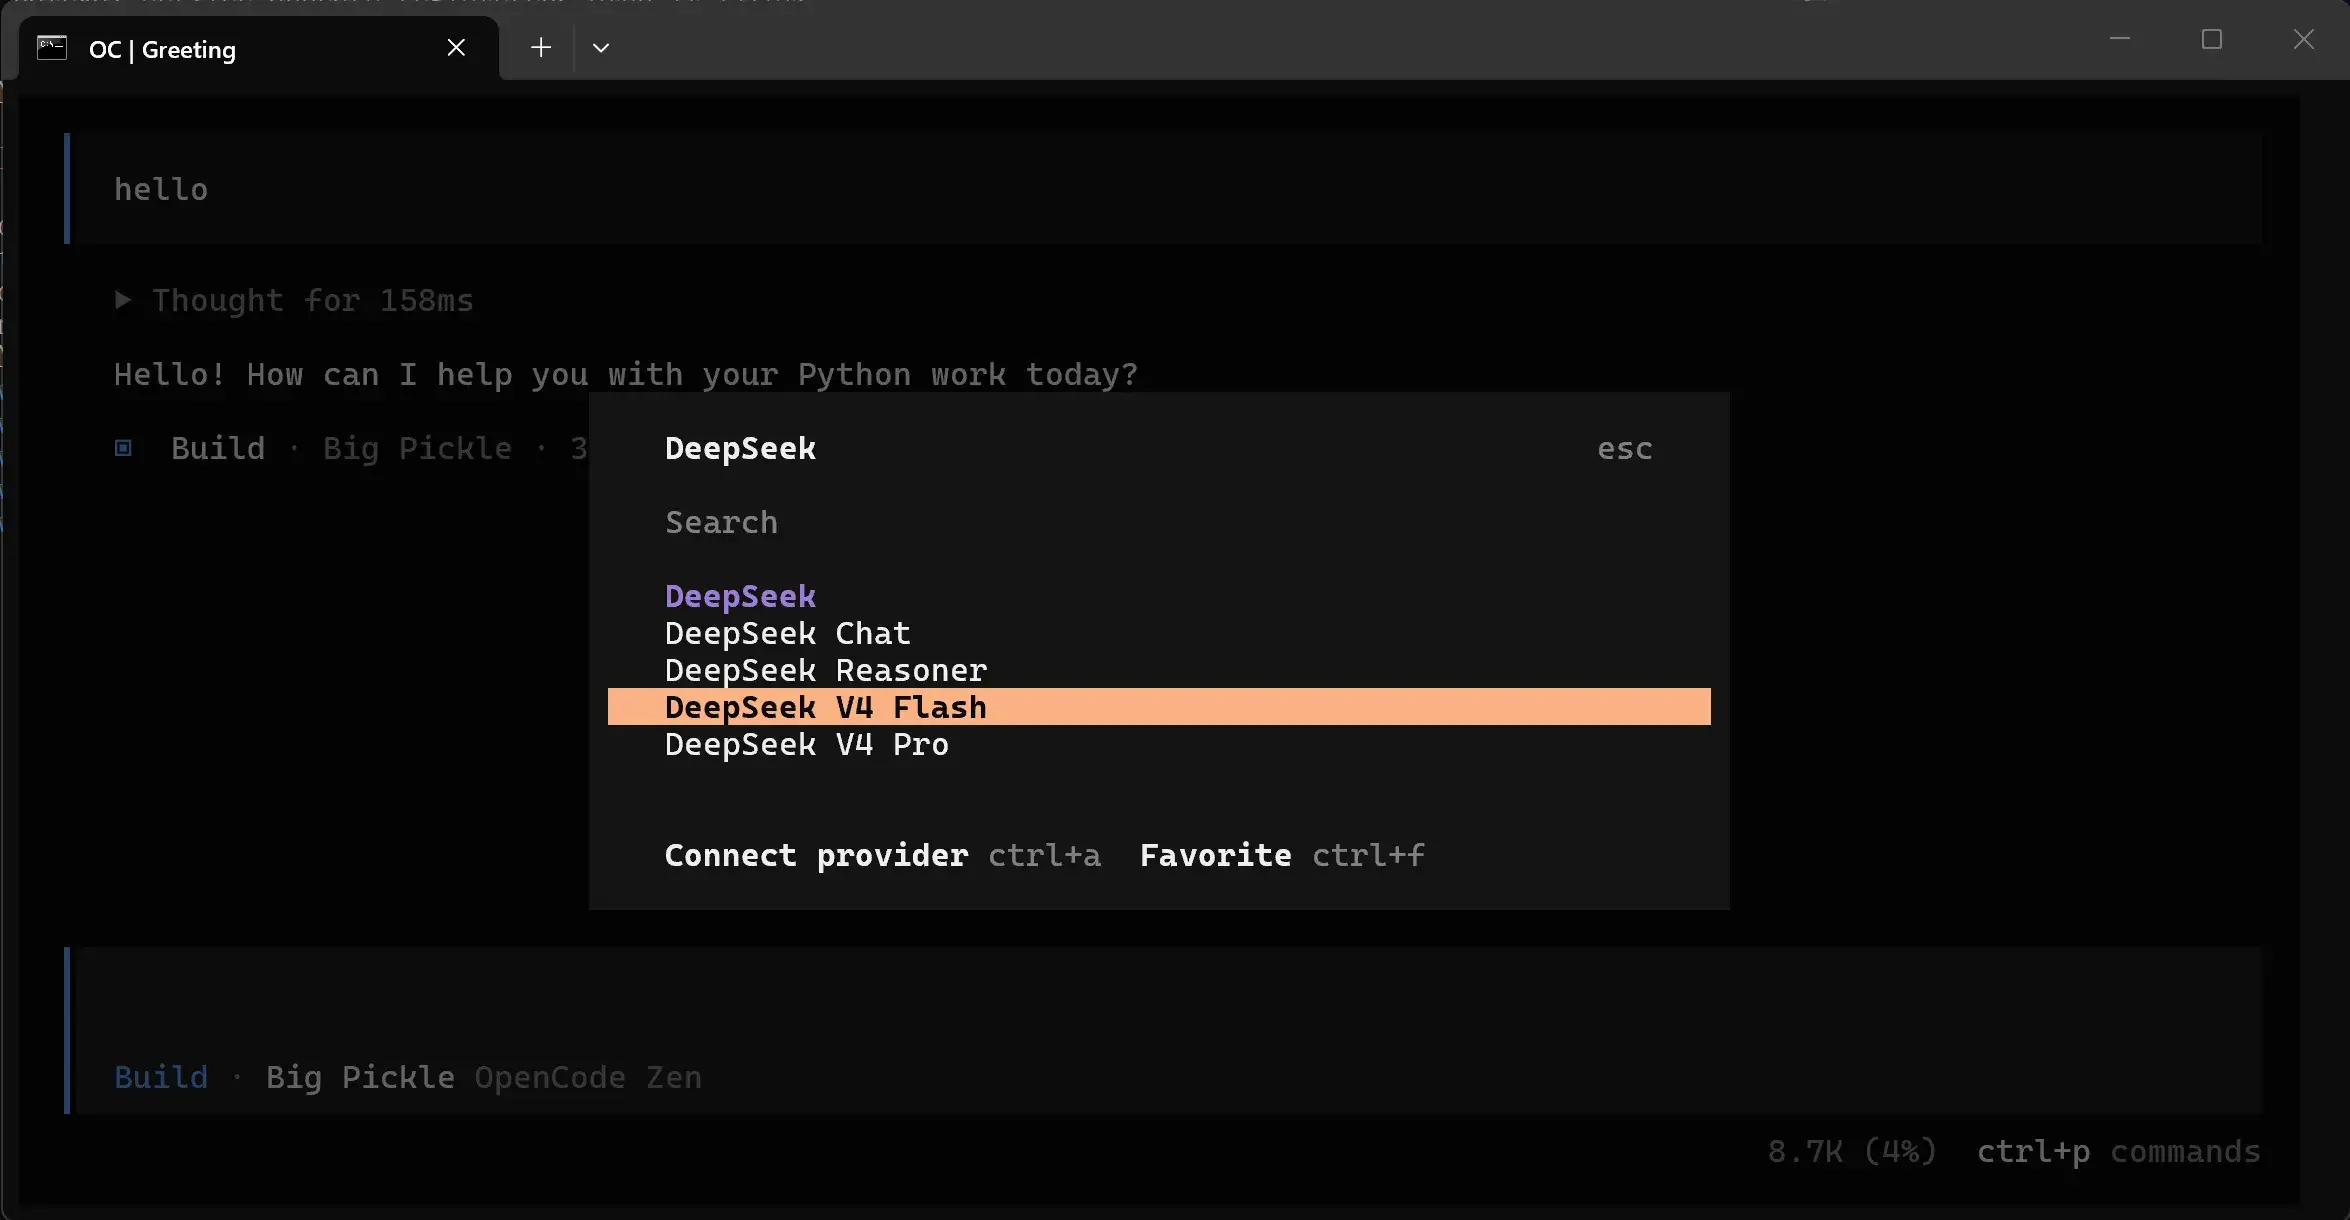
命令 \connect 用自己的 API Key:
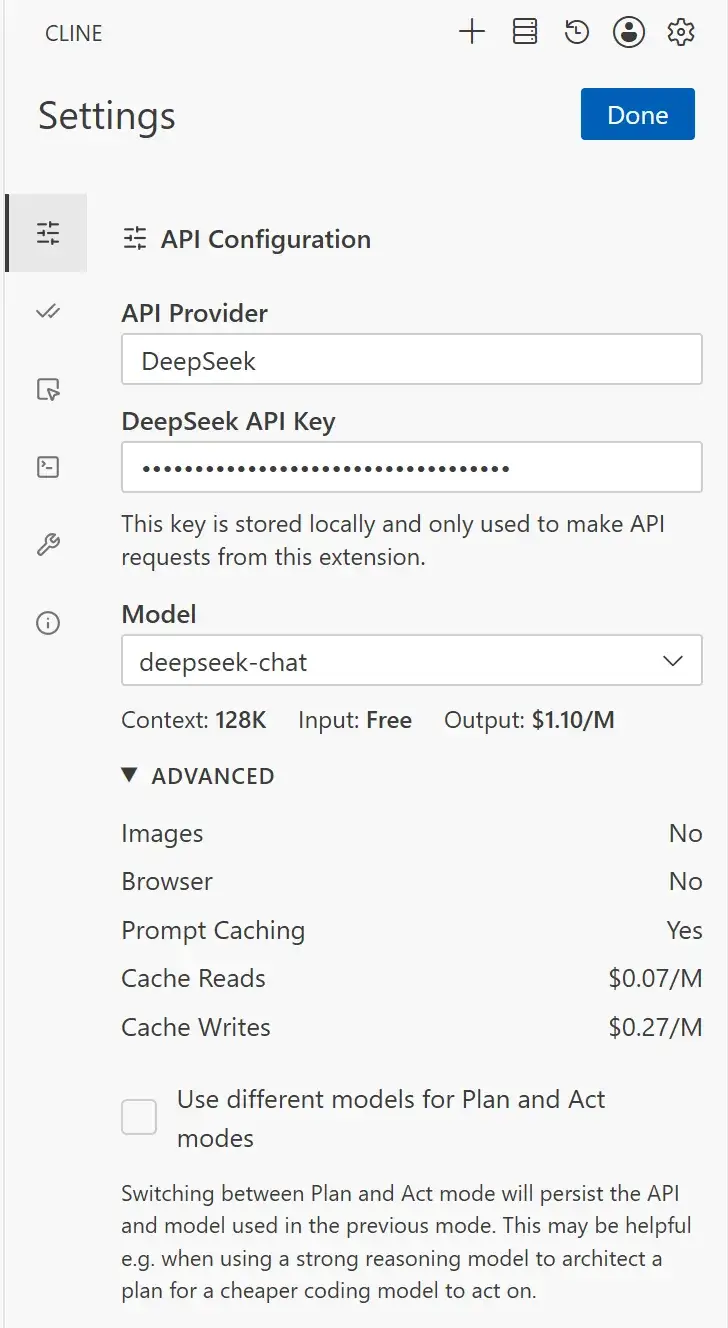
Cline
VSC 上装这个插件。配置好 API Key。
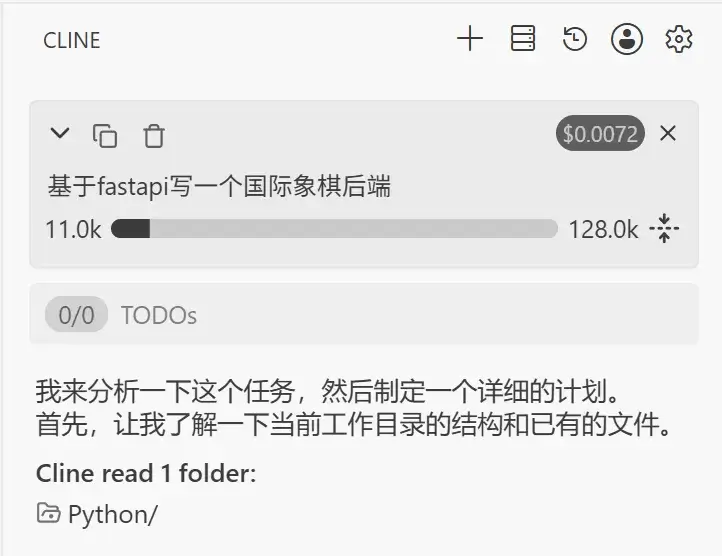
像 Cursor、Copilot 一样问问题:
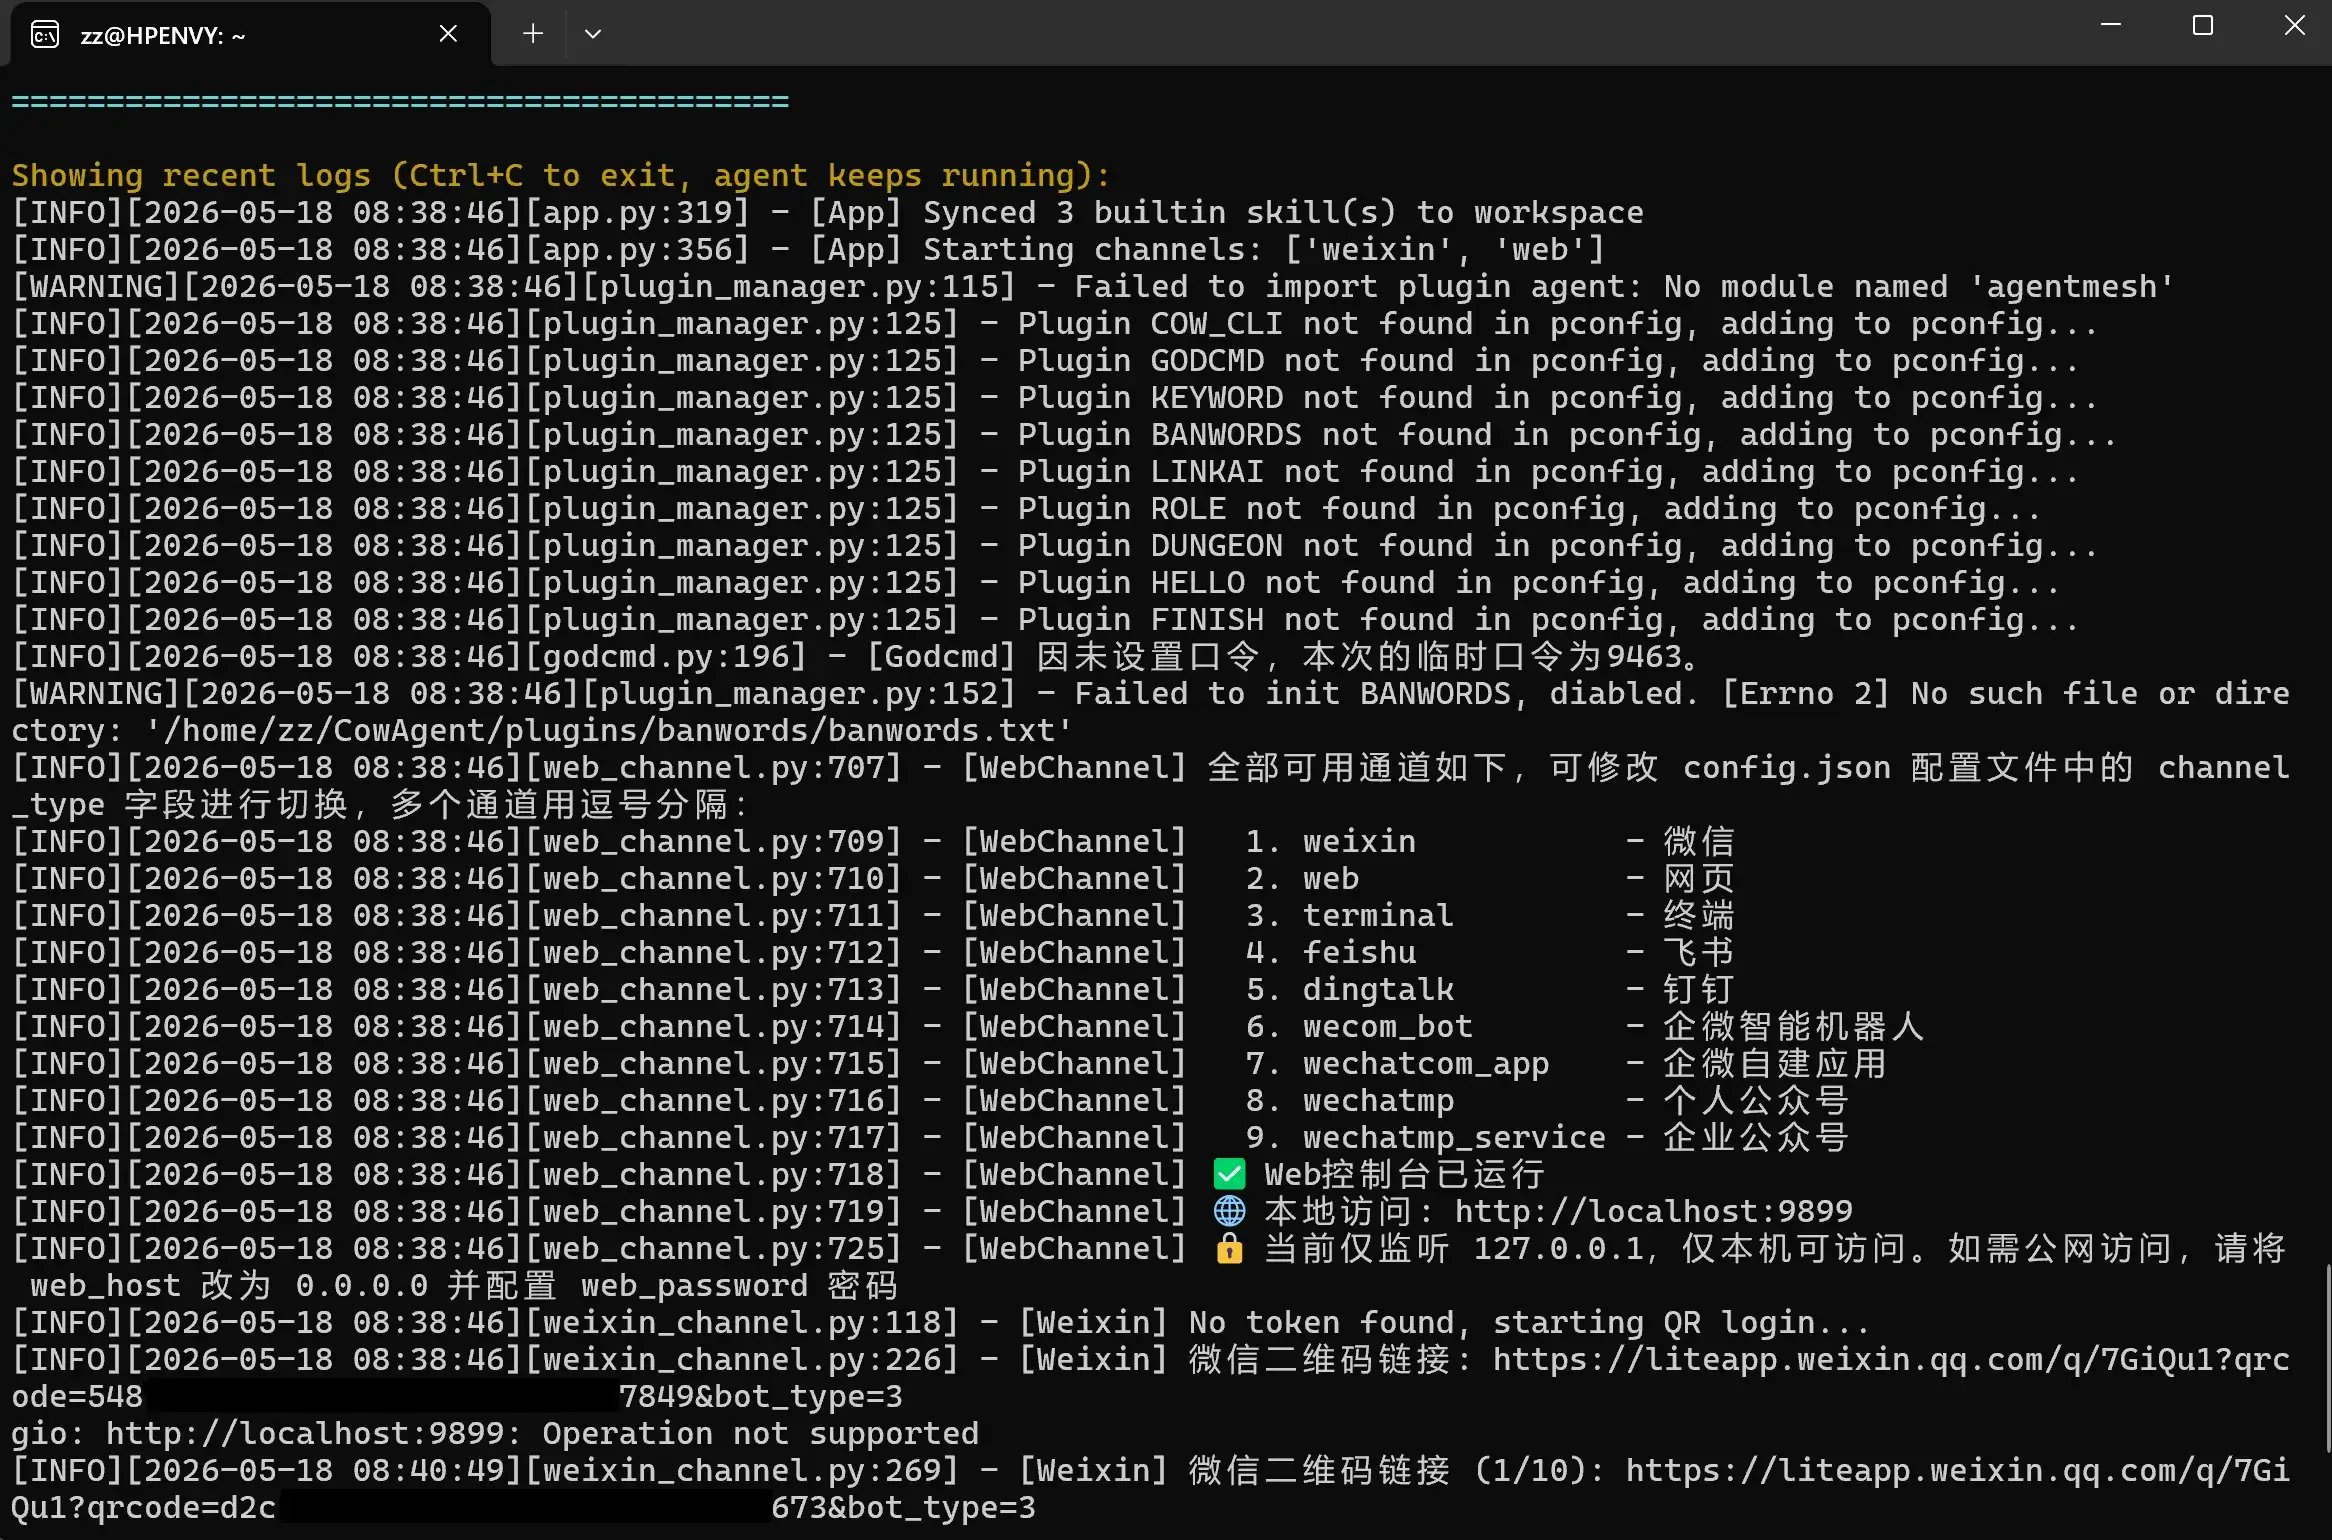
CowAgent
还是在 WSL 里安装吧……WSL 自带 3.12 的 python,再安装 pip:
sudo apt install -y python3-pip安装 CowAgent:
bash <(curl -fsSL https://cdn.link-ai.tech/code/cow/run.sh)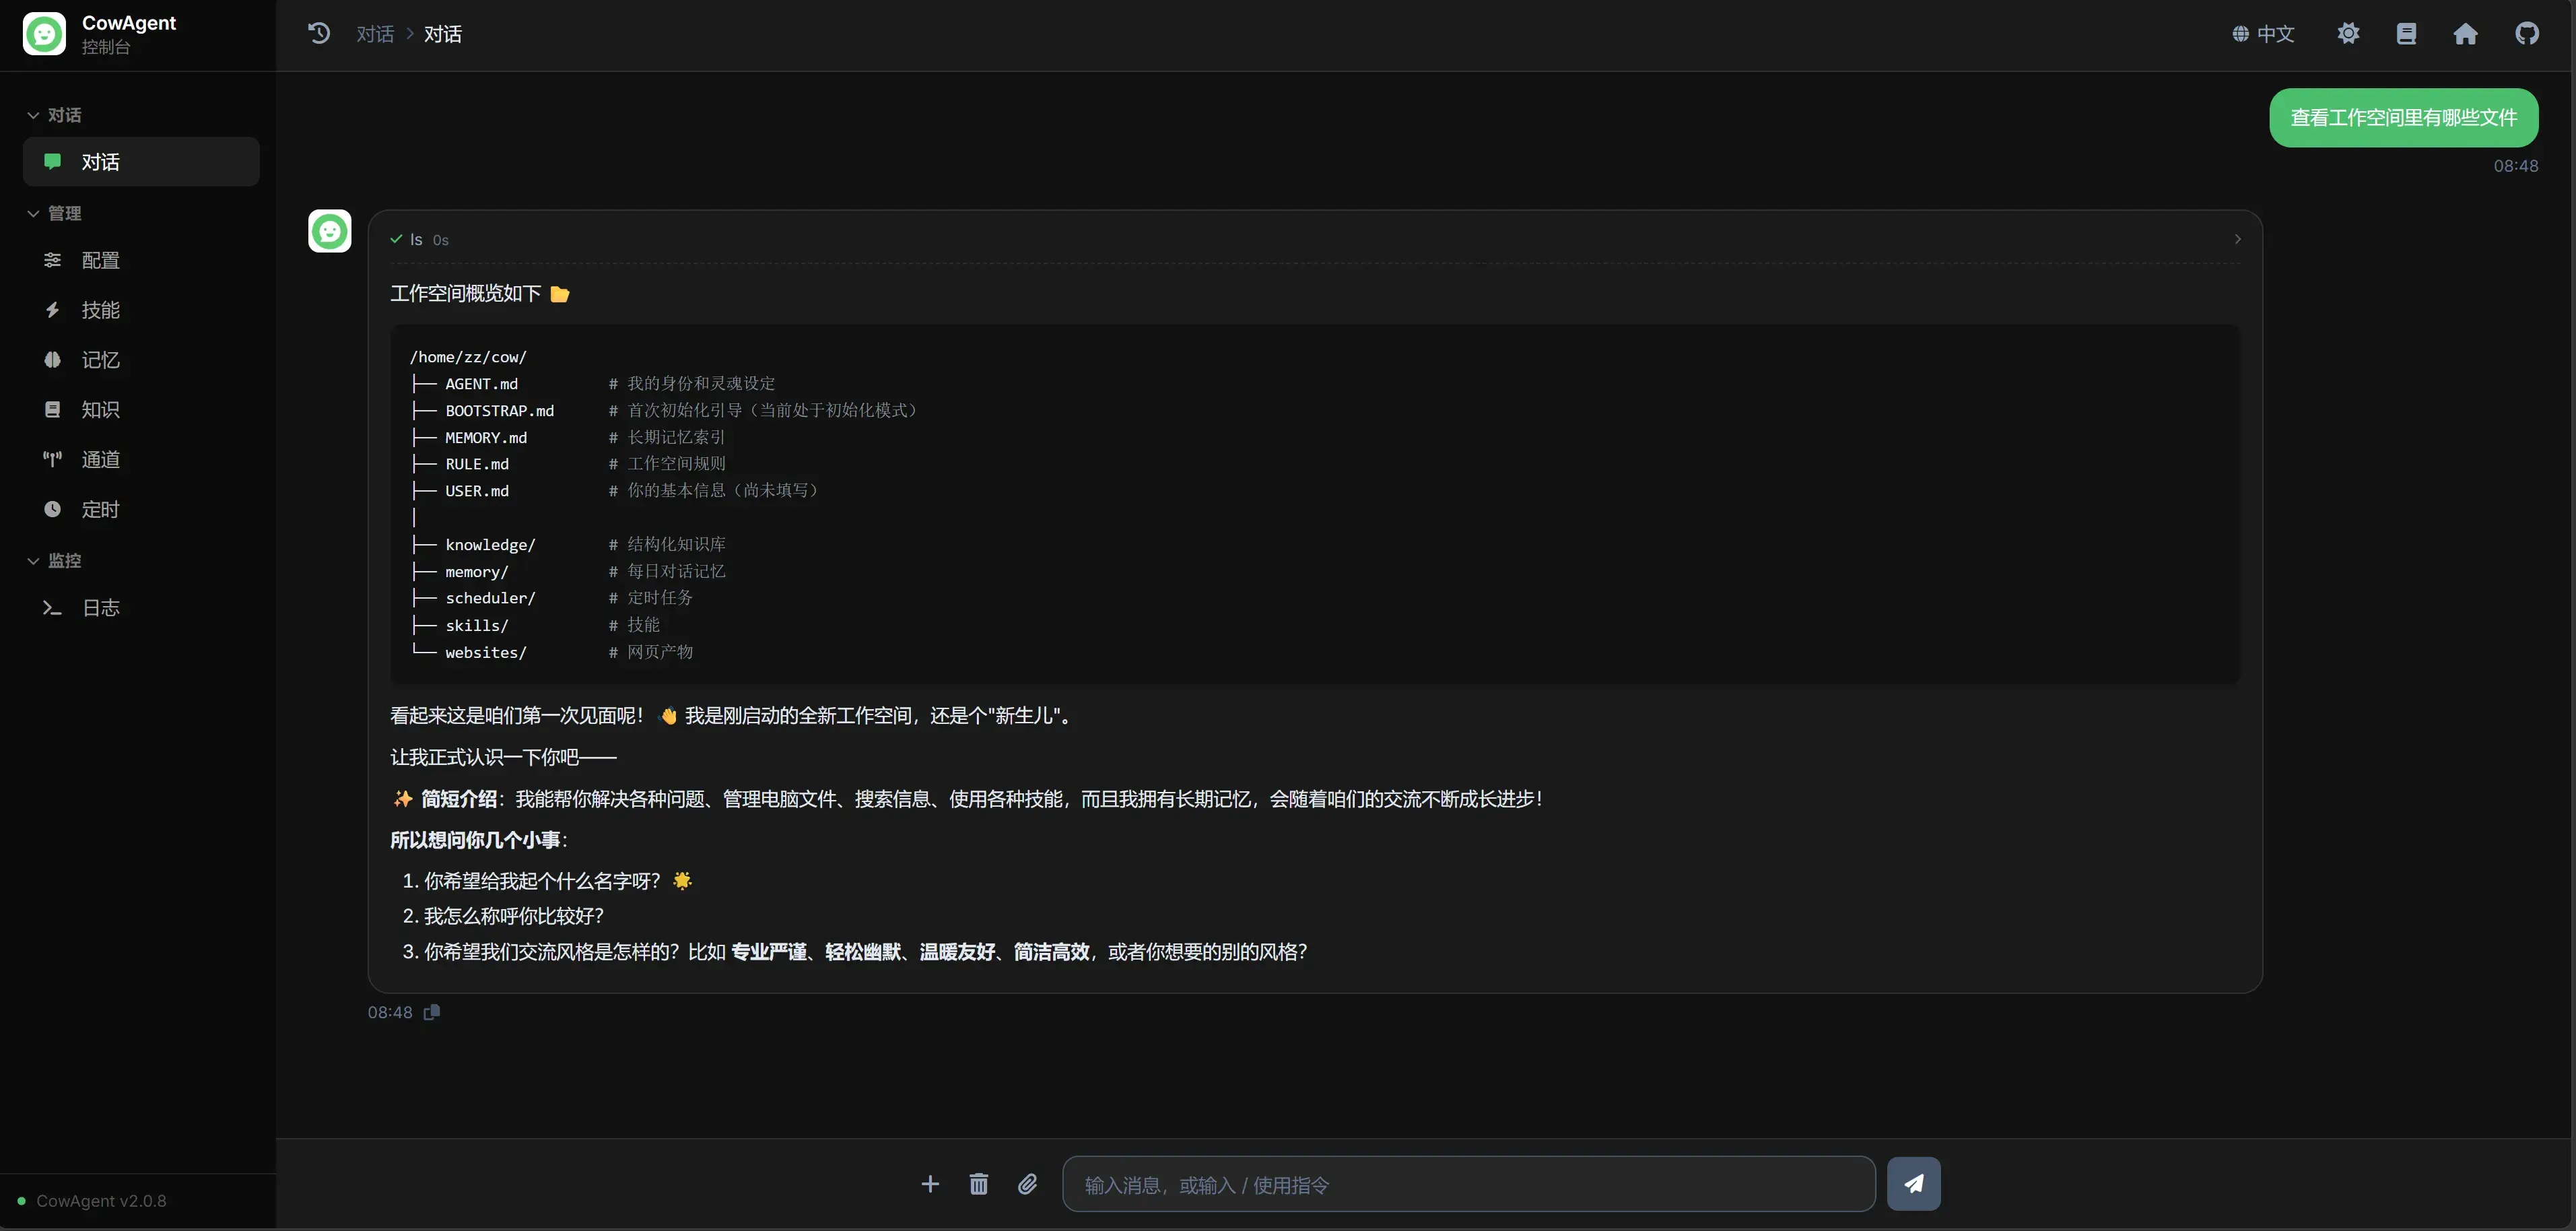
进入 http://localhost:9899/chat 开始聊天:
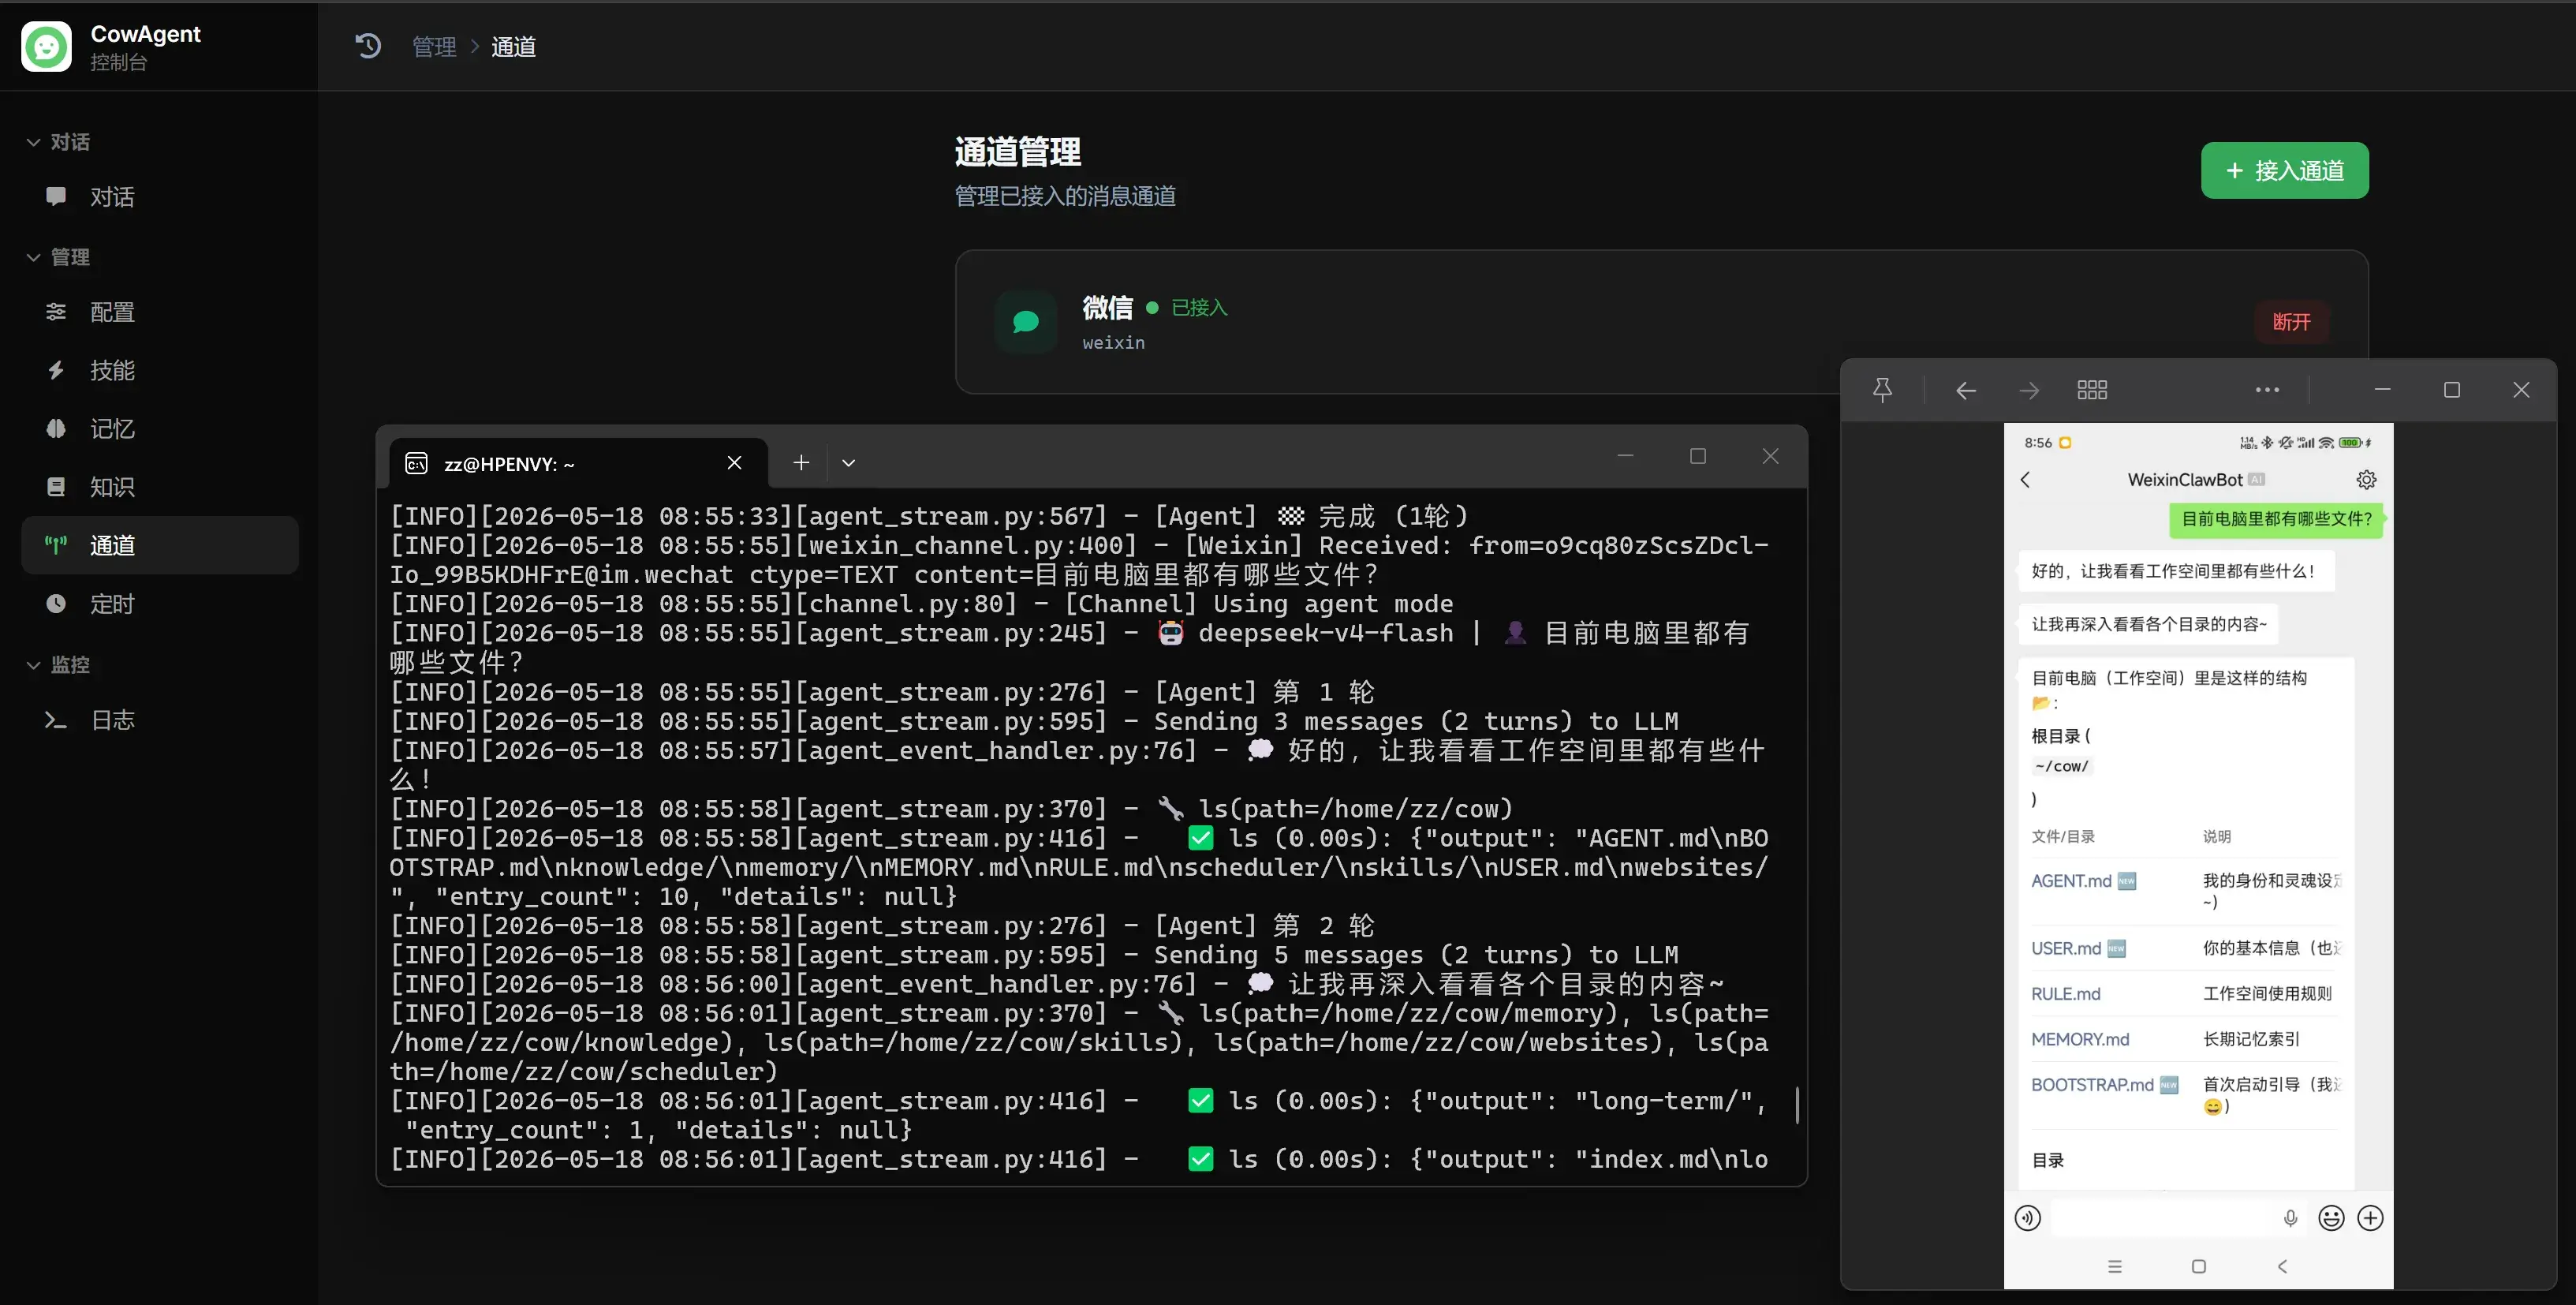
扫码接入微信将对话窗口移至微信:

Copilot
下载能让 Copilot 接入 DeepSeek API 的插件:
配置好 API Key 后,选用 DeepSeek 系列模型。然后像正常用 Copilot 一样使用。
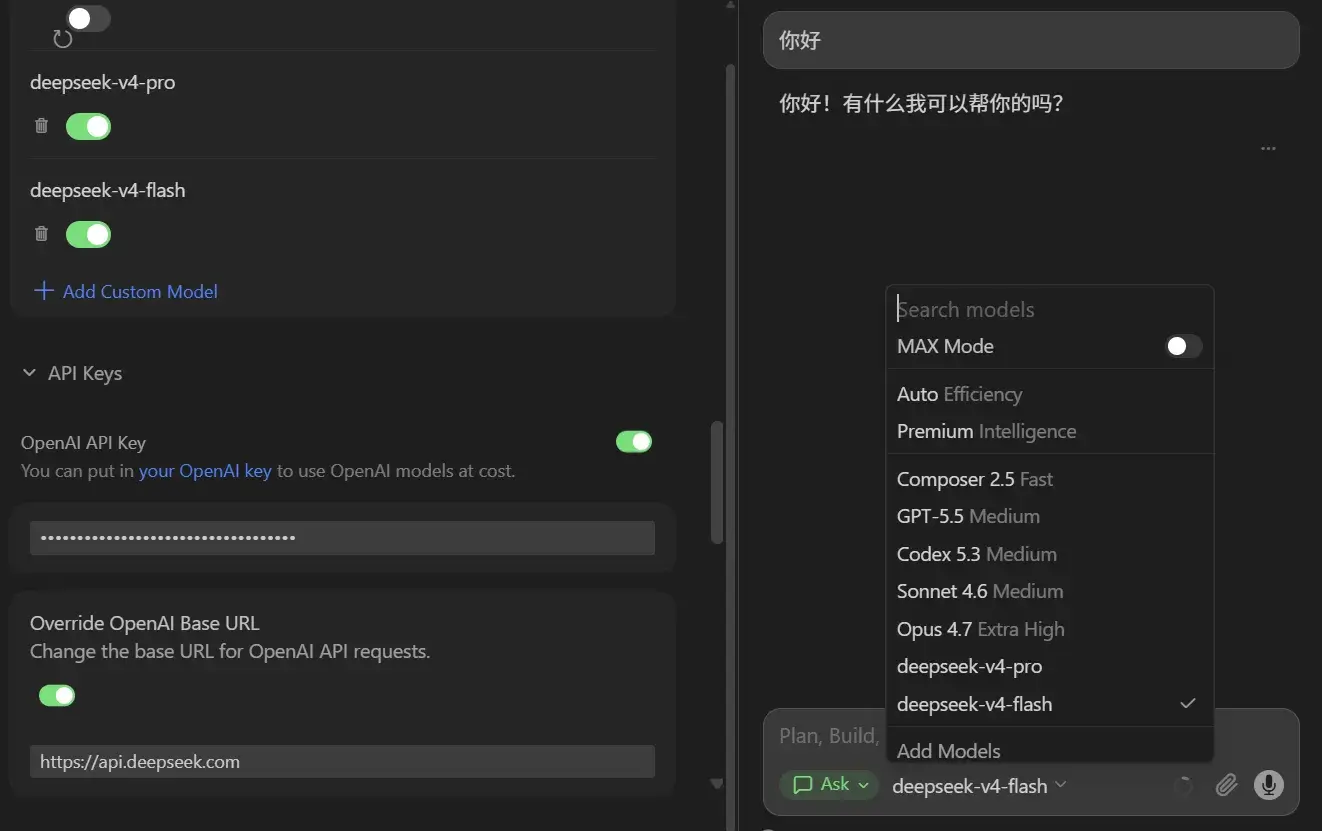
Cursor(兼容性有问题)
模型中选择 Add Models,然后
-
输入 API Key。
-
Override OpenAI Base URL:
https://api.deepseek.com -
添加模型
deepseek-v4-pro和deepseek-v4-flash
开耍!然后出问题了:

查了下 yxlao/deepseek-cursor-proxy: Fixes missing reasoning_content for DeepSeek V4:
git clone git@github.com:wustghj/cursor-deepseek-v4-proxy.git
cd cursor-deepseek-v4-proxy
python -m venv venv
venv\Scripts\activate
pip install -r requirements.txt
从 Releases · cloudflare/cloudflared 下载 cloudflared-windows-amd64.exe 到项目目录中,然后:
start_proxy.bat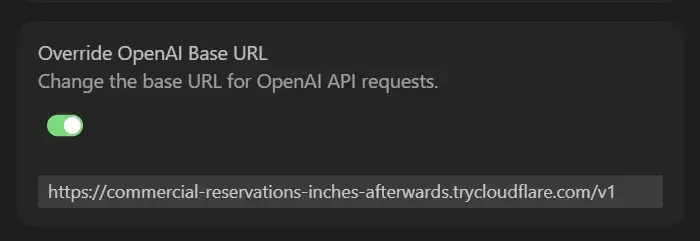
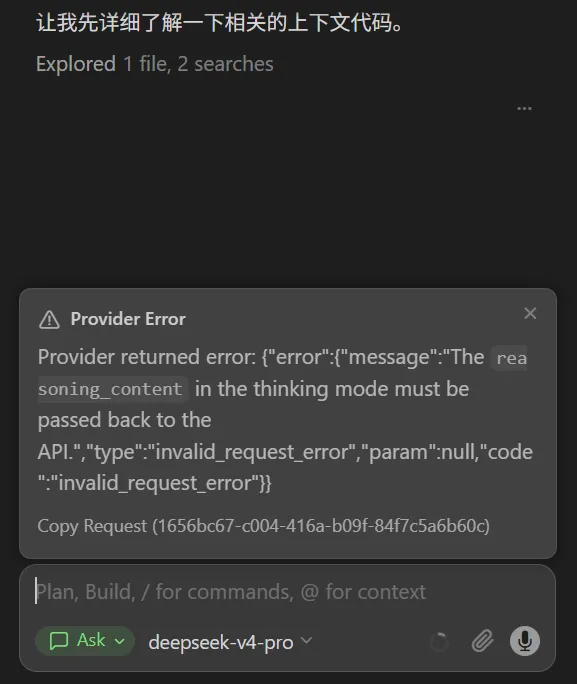
找到这样的地址替换到 Override OpenAI Base URL,后面加 /v1:
现在正常。但是以后用 Cursor 都必须开启一个这样的服务才能用,只好作为 Cursor 发作 Taking longer than expected 时候的备用应急方案了……
如果要用 Cursor 原先 Coding Plan 的模型,则还得把这个 OpenAI API Key 开关给关了。
提示
但是如果用其他模型(如 Minimax/GLM/Qwen)则没出现这样的问题,照常改代码。
又但是,我总觉得还是兼容性不好,调 API 用 Cursor 总感觉比它原生的 Auto 笨许多……烧了我一堆 Token 还没把问题解决~😭
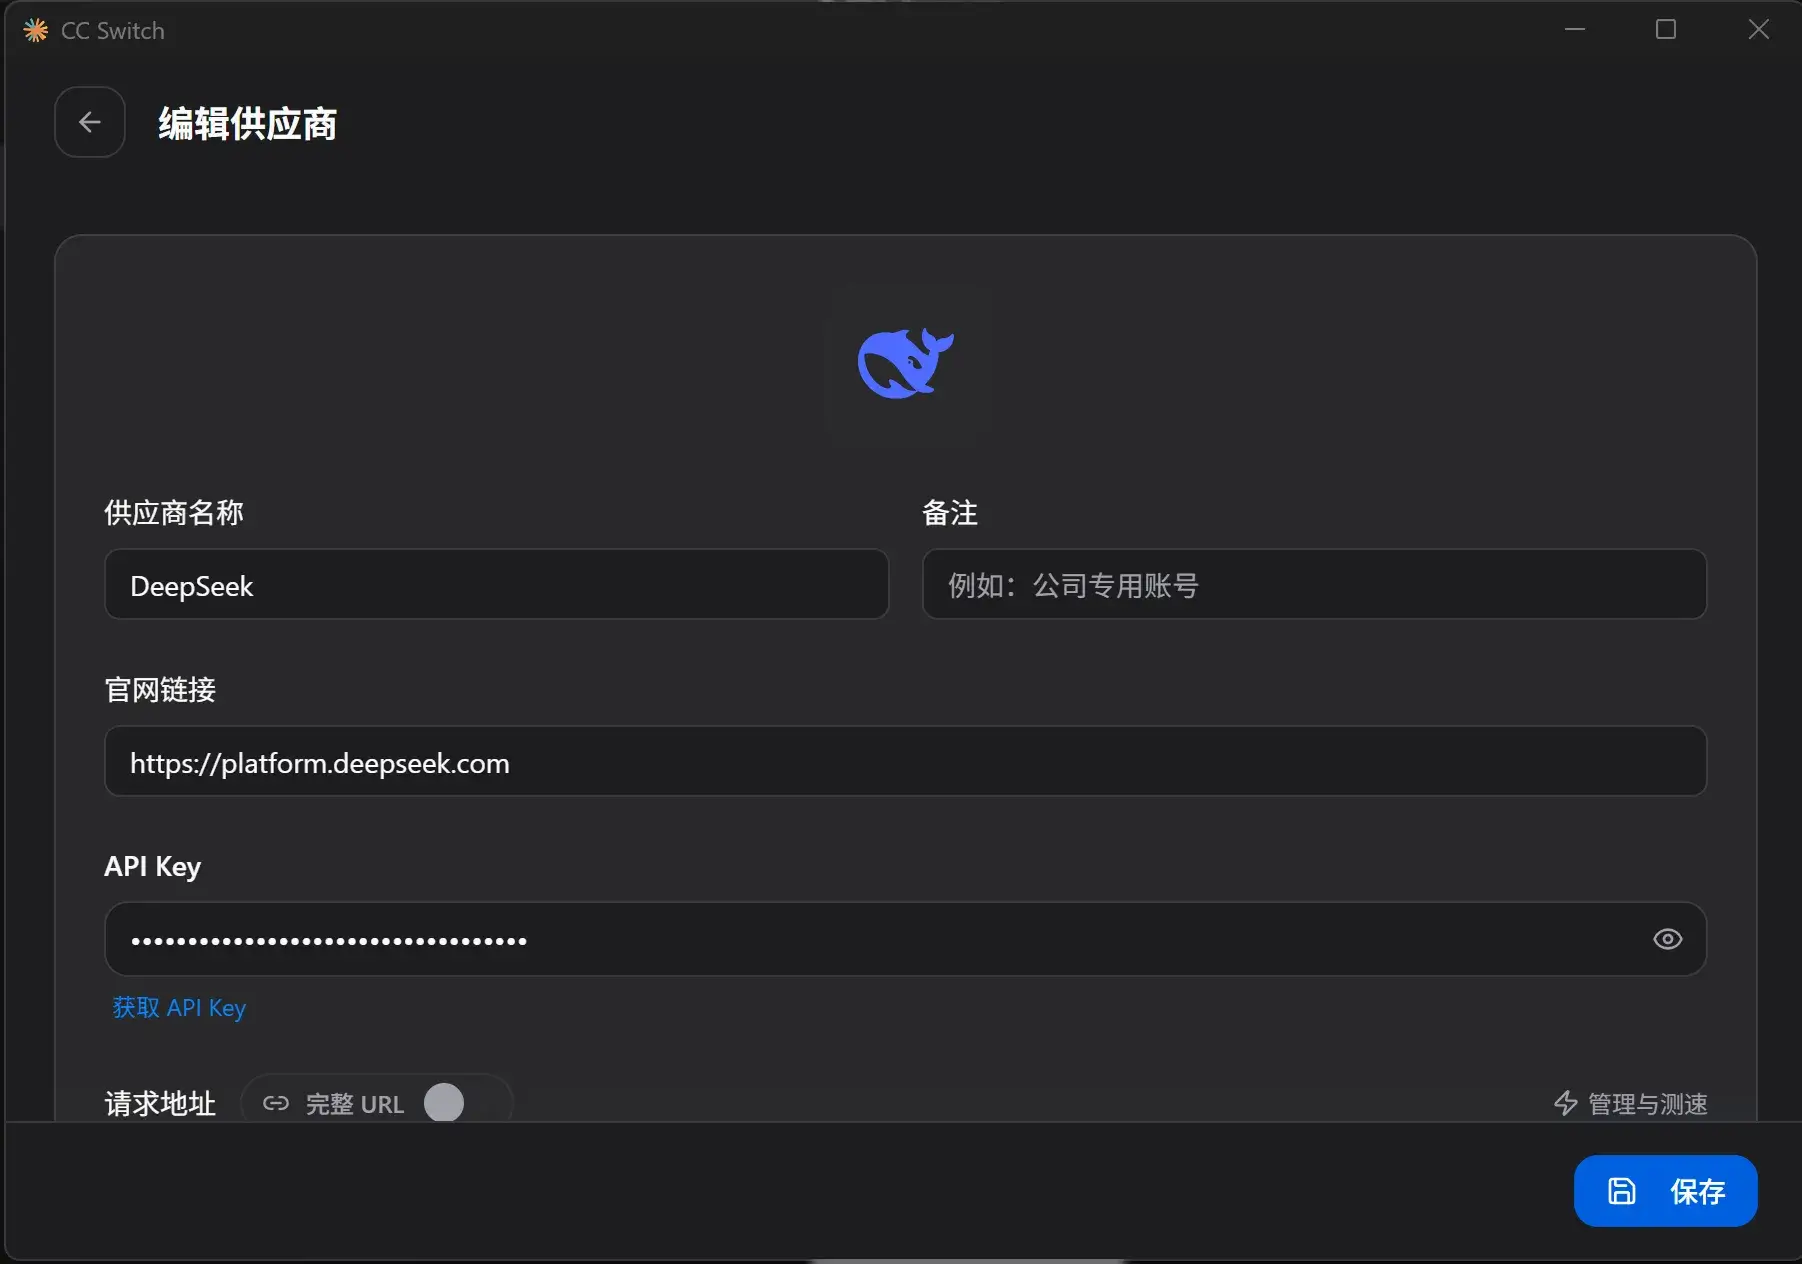
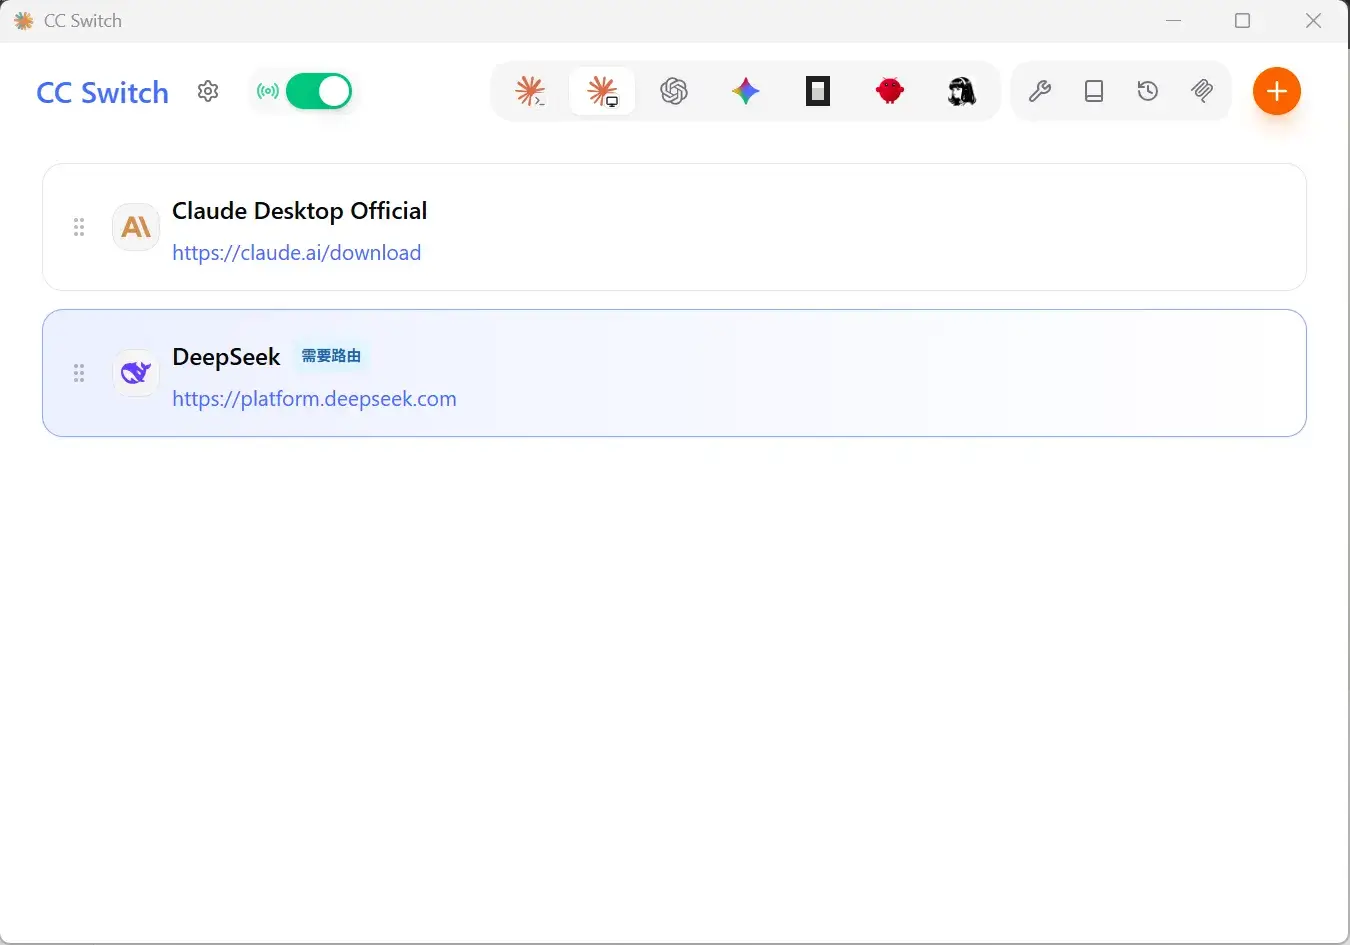
Claude Code
安装:
npm i -g @anthropic-ai/claude-code@latest使用 CC Switch 中转:
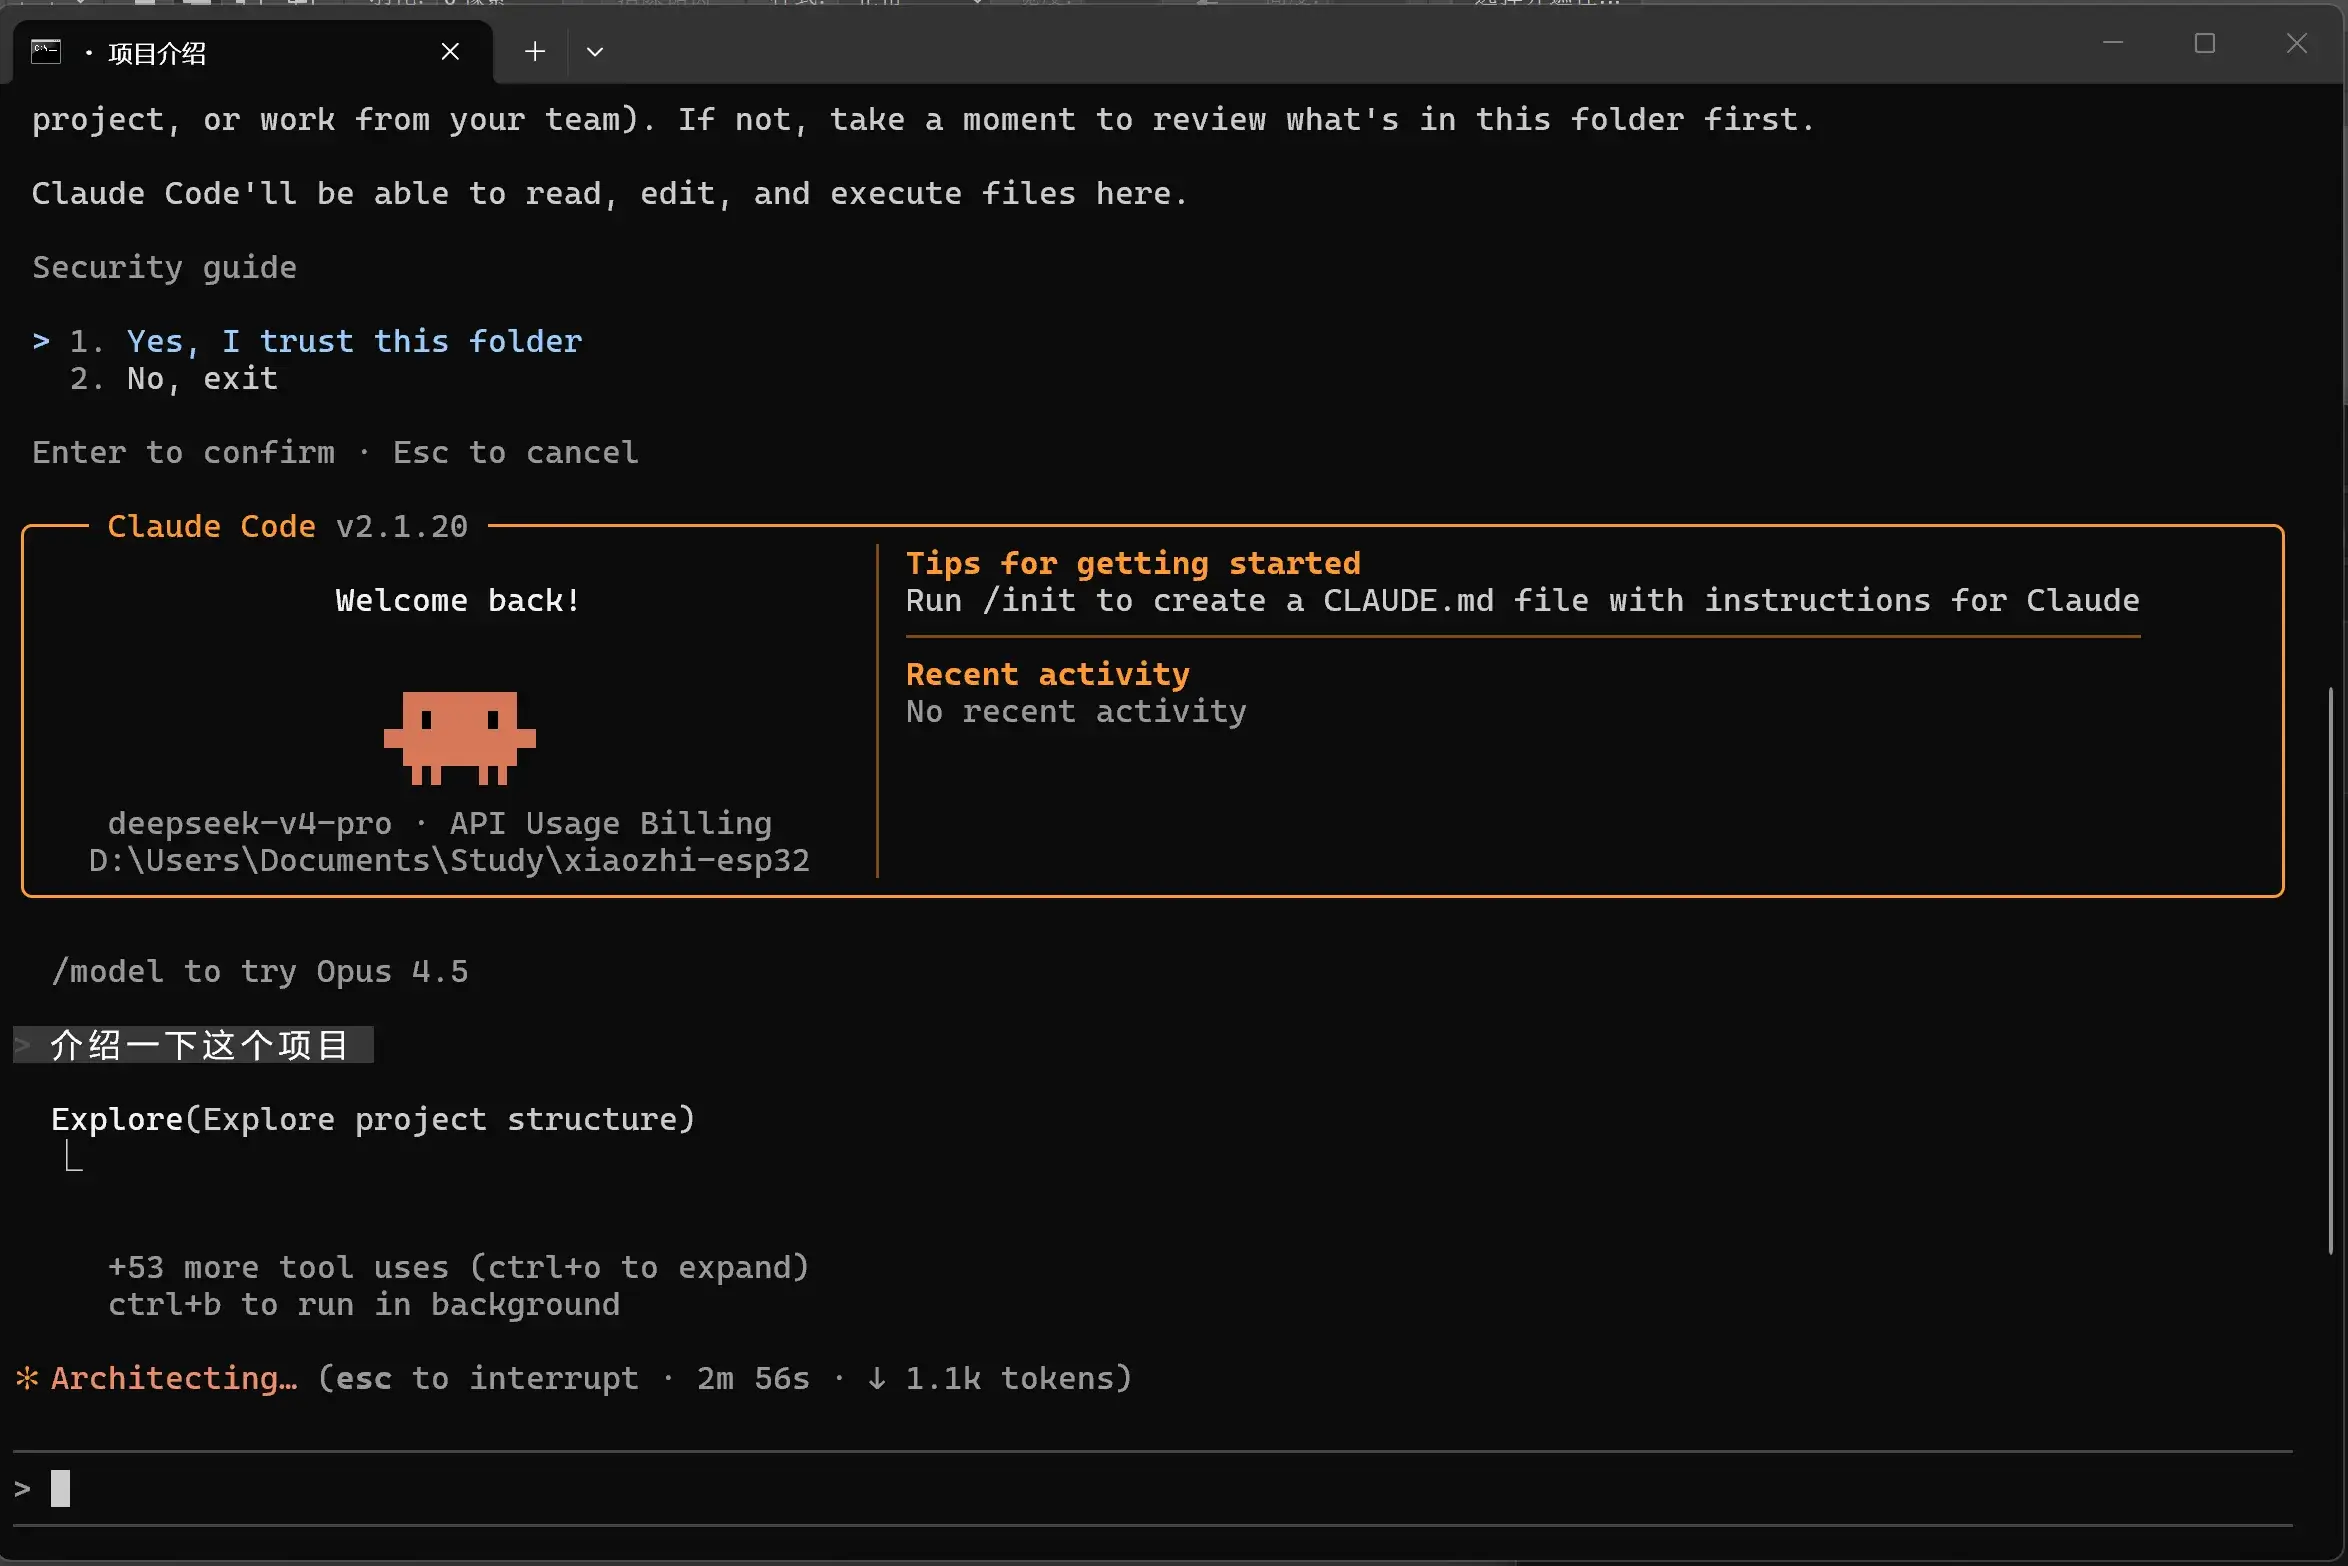
在项目中使用 claude 命令即可开耍。
Claude Code 的编辑记录在 Copilot 中也可以看到,真是神奇!
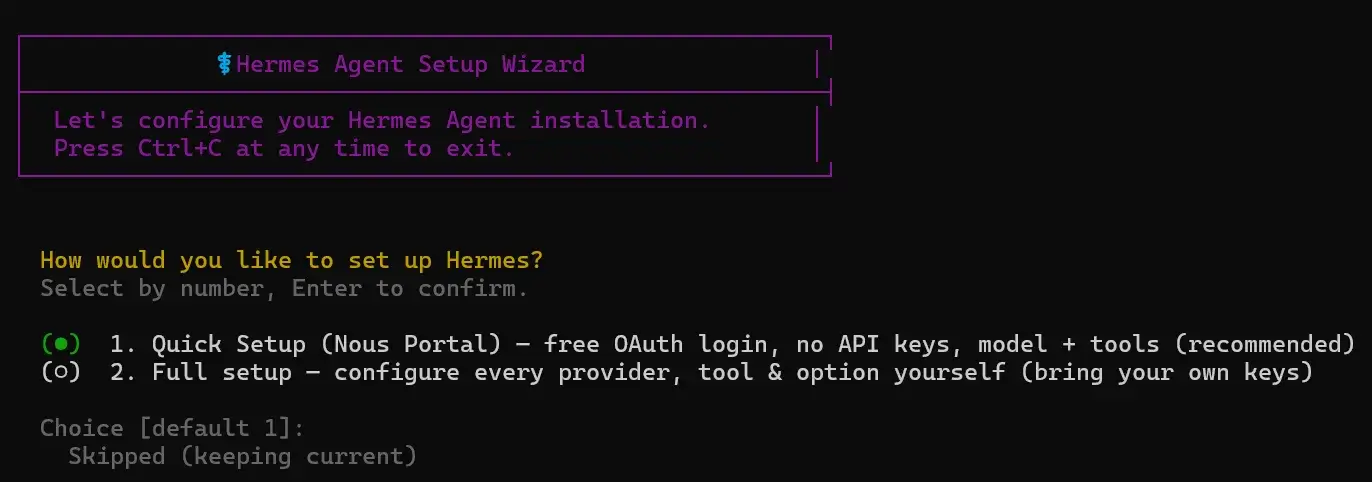
Hermes
好像跟 OpenClaw 差不多。
| 维度 | OpenClaw | Hermes |
|---|---|---|
| 核心结构 | Gateway 控制中心 | Agent 自循环学习 |
| 任务组织 | Skills 插件系统 | 自动生成技能 |
| 控制方式 | 人类主导配置 | AI 自主优化 |
| 多渠道支持 | 很强(聊天平台整合) | 较弱 |
| 记忆系统 | 外部化/结构化 | 分层+经验记忆 |
| 学习能力 | 靠人维护 skills | 自动进化 |
直接神秘命令开始安装:
powershell -NoProfile -ExecutionPolicy Bypass -EncodedCommand aQByAG0AIABoAHQAdABwAHMAOgAvAC8AcgBhAHcALgBnAGkAdABoAHUAYgB1AHMAZQByAGMAbwBuAHQAZQBuAHQALgBjAG8AbQAvAE4AbwB1AHMAUgBlAHMAZQBhAHIAYwBoAC8AaABlAHIAbQBlAHMALQBhAGcAZQBuAHQALwBtAGEAaQBuAC8AcwBjAHIAaQBwAHQAcwAvAGkAbgBzAHQAYQBsAGwALgBwAHMAMQAgAHwAIABpAGUAeAA=按它的提示来,登录,balabala……
◆ Tool Availability Summary
  5/10 tool categories available:

   ✗ Vision (image analysis) (missing run 'hermes setup' to configure)
   ✗ Mixture of Agents (missing OPENROUTER_API_KEY)
   ✗ Web Search & Extract (missing EXA_API_KEY, PARALLEL_API_KEY, FIRECRAWL_API_KEY/FIRECRAWL_API_URL, TAVILY_API_KEY, or SEARXNG_URL)
   ✓ Browser Automation (Local browser)
   ✗ Image Generation (missing FAL_KEY or OPENAI_API_KEY)
   ✓ Text-to-Speech (Edge TTS)
   ✗ Skills Hub (GitHub) (missing GITHUB_TOKEN)
   ✓ Terminal/Commands
   ✓ Task Planning (todo)
   ✓ Skills (view, create, edit)

⚠ Some tools are disabled. Run 'hermes setup tools' to configure them,
⚠ or edit ~/AppData\Local\hermes/.env directly to add the missing API keys.


┌─────────────────────────────────────────────────────────┐
│              ✓ Setup Complete!                          │
└─────────────────────────────────────────────────────────┘

📁 All your files are in ~/AppData\Local\hermes/:

   Settings:  C:\Users\19048\AppData\Local\hermes\config.yaml
   API Keys:  C:\Users\19048\AppData\Local\hermes\.env
   Data:      C:\Users\19048\AppData\Local\hermes/cron/, sessions/, logs/

────────────────────────────────────────────────────────────

📝 To edit your configuration:

   hermes setup          Re-run the full wizard
   hermes setup model    Change model/provider
   hermes setup terminal Change terminal backend
   hermes setup gateway  Configure messaging
   hermes setup tools    Configure tool providers

   hermes config         View current settings
   hermes config edit    Open config in your editor
   hermes config set <key> <value>
                          Set a specific value

   Or edit the files directly:
   nano C:\Users\19048\AppData\Local\hermes\config.yaml
   nano C:\Users\19048\AppData\Local\hermes\.env

────────────────────────────────────────────────────────────

🚀 Ready to go!

   hermes              Start chatting
   hermes gateway      Start messaging gateway
   hermes doctor       Check for issues


+---------------------------------------------------------+
|              [OK] Installation Complete!                |
+---------------------------------------------------------+

* Your files:

   Config:    C:\Users\19048\AppData\Local\hermes\config.yaml
   API Keys:  C:\Users\19048\AppData\Local\hermes\.env
   Data:      C:\Users\19048\AppData\Local\hermes\cron\, sessions\, logs\
   Code:      C:\Users\19048\AppData\Local\hermes\hermes-agent\

---------------------------------------------------------

* Commands:

   hermes              Start chatting
   hermes setup        Configure API keys & settings
   hermes config       View/edit configuration
   hermes config edit  Open config in editor
   hermes gateway      Start messaging gateway (Telegram, Discord, etc.)
   hermes update       Update to latest version

---------------------------------------------------------

[*] Restart your terminal for PATH changes to take effect
重启终端,如下命令配置 API Key:
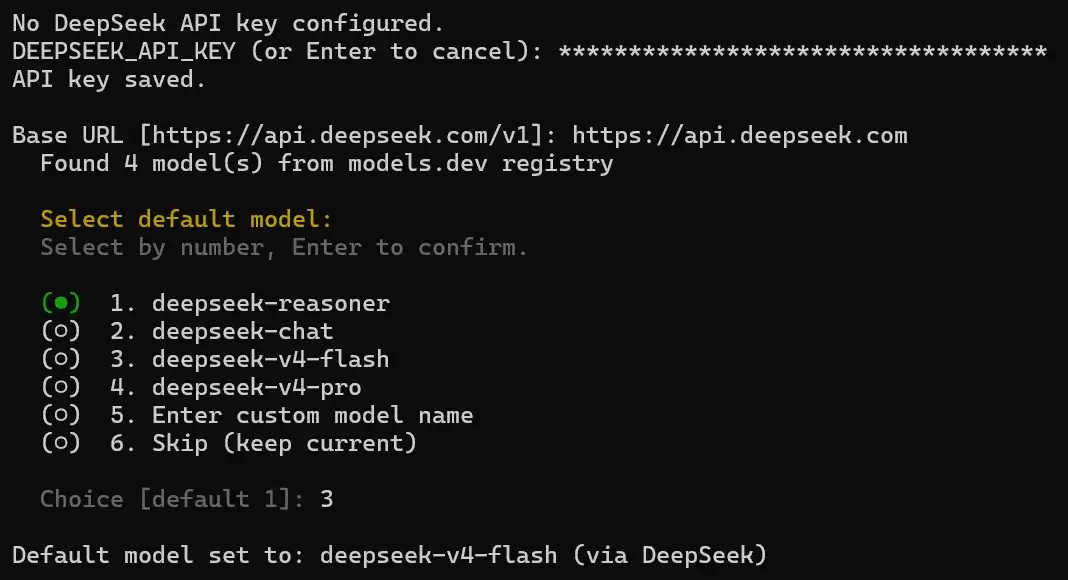
hermes model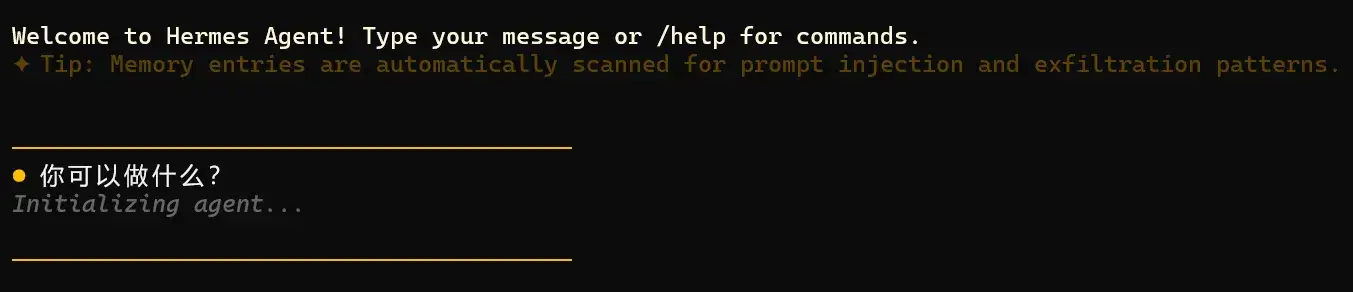
使用如下命令开跑:
hermes
你好!我是 Hermes Agent,一个运行在你的终端里的 CLI AI 助手。以下是我可以帮你做的事情:
🧑💻 软件开发
- 用 TDD、代码审查、debugging 等最佳实践写代码、重构、调试
- 管理 GitHub PR/issue/repo,走完整个 CI 流程
- 多文件编辑、项目规划、架构设计
- 通过 delegate_task 并行派分子 agent 做独立任务
🖥️ 系统 & DevOps
- 运行 shell 命令、管理后台进程、安装依赖
- 定时任务(cronjob)—— 定期执行脚本或 LLM 任务
- 监控系统状态、检查端口/服务
🌐 上网 & 浏览器
- 网页浏览、表单填写、截图分析
- 搜索信息、阅读文档、抓取数据
📁 文件管理
- 读写文件、搜索内容、批量编辑
- 项目结构分析、代码统计
🎨 创意 & 设计
- 生成 ASCII 艺术、SVG 架构图、p5.js 交互、像素画
- 生成 HTML/CSS 设计原型(模仿 Stripe、Linear 等风格)
- 漫画、信息图、文章插图
📊 数据科学 & ML
- 运行 Jupyter notebook、分析数据、画图
- 部署/查询 HuggingFace 模型、本地 GGUF 推理
- 用 DSPy 优化 prompt、管理 W&B 实验
📝 生产力
- 管理 Notion、Linear、Airtable、Google Workspace
- 发送邮件(Himalaya CLI)
- OCR 提取 PDF/扫描件文字
- 创建 PPT 幻灯片
🎵 多媒体
- 播放/搜索 Spotify
- YouTube 转录 → 摘要/博客
- 文字转语音
💡 还有更多!
- 跨会话持久记忆 —— 记住你的偏好和项目约定
- 技能系统 —— 学会的工作流可以保存复用
- 智能家居(Philips Hue)、Pokemon 模拟器、游戏服务器管理……
有什么想让我帮忙的吗?直接说就行!Claude Desktop
下载并安装:
要登录?直接关掉,CC Switch 配置好并打开路由:

重新打开 Claude 开耍: