正文
换域名
github.io 这个域名在冀大校园网会直接被墙(估计是 DNS 污染?),换个域名让冀大校园网里也能访问!
- 学生认证域名专享低至 1 元 (aliyun.com) 阿里云学生认证后,可以一块钱买一年的域名,真是太棒了!

买一个域名:gz-metal-cell.top。
要实名认证才可以使用!进去操作一番,直到审核通过域名可以解析为止。

设置主机记录:
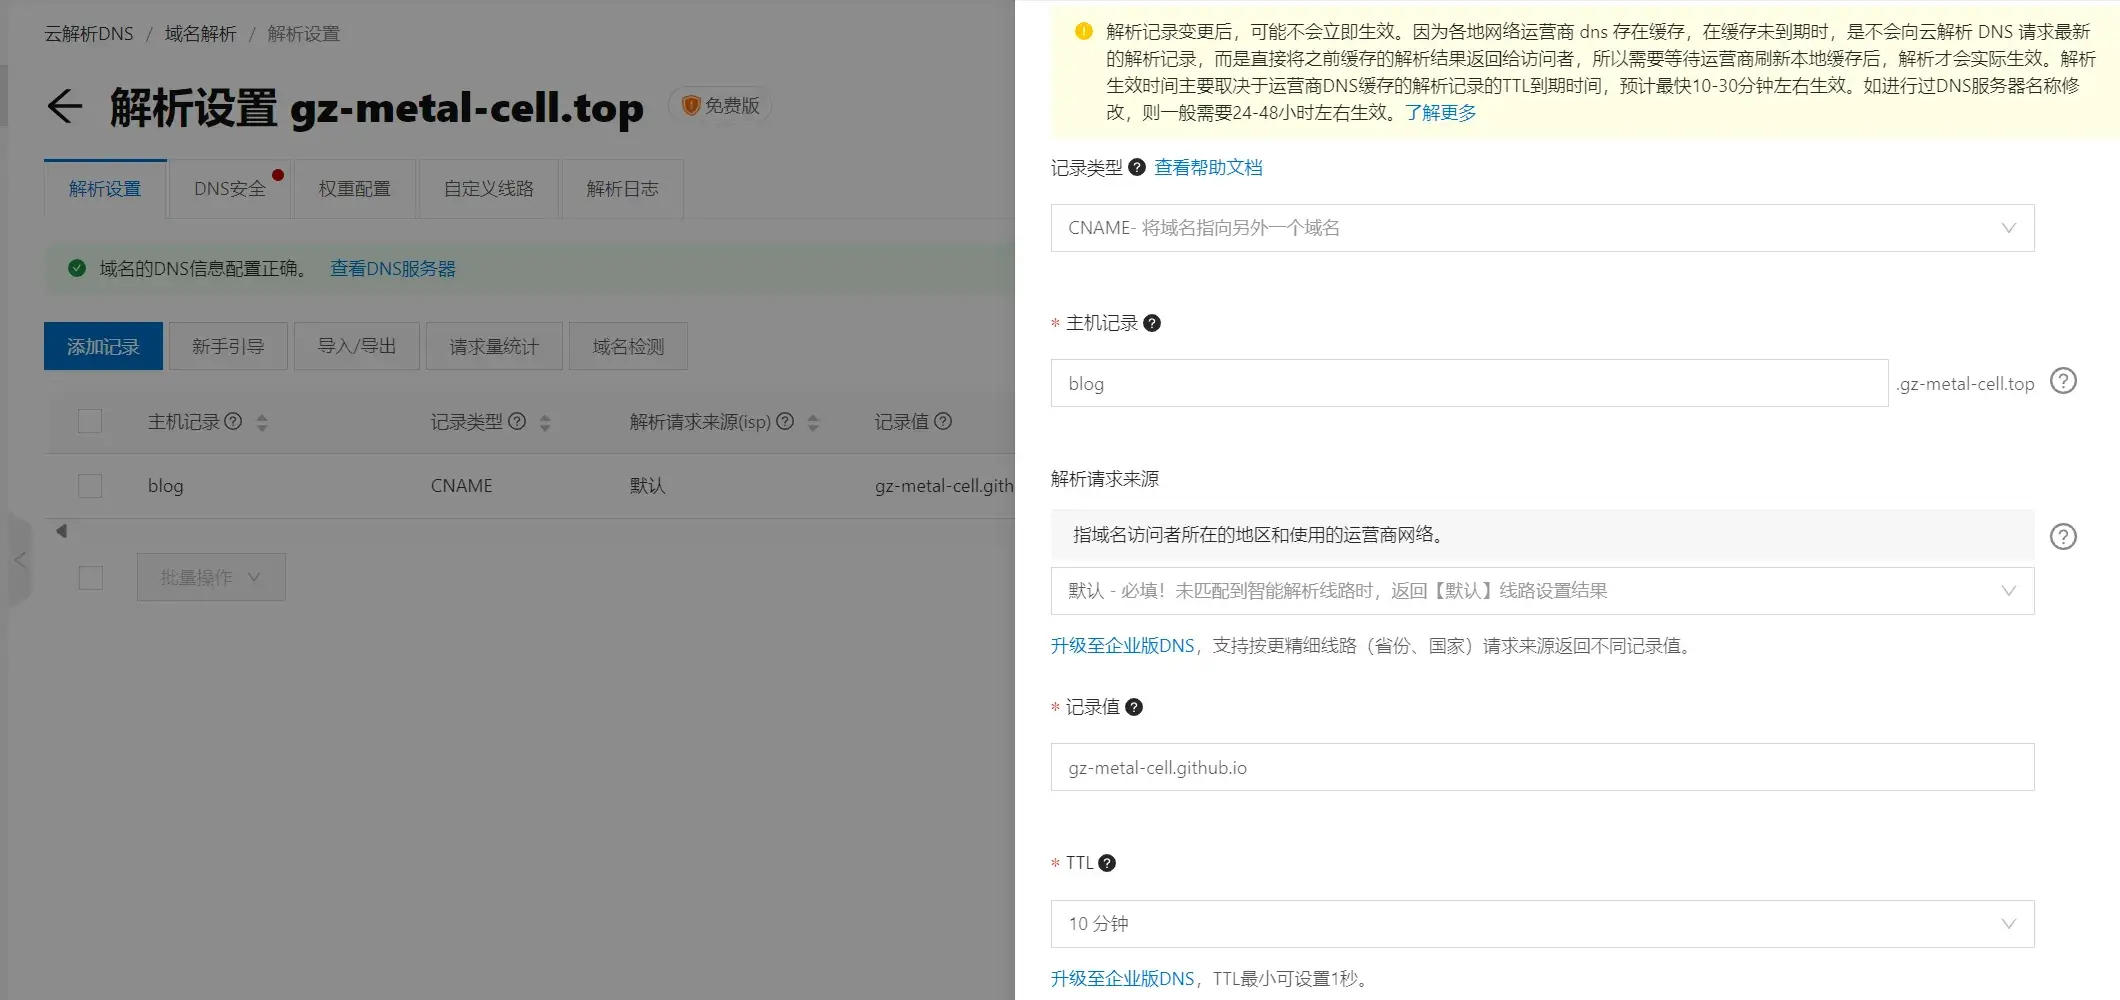
pro 神这么说道:
Github Page 提供了
Custom domain服务,在
username.github.io仓库下setting->Pages->Custom domain填入域名blog.promefire.top。保存后会在根目录生成CNAME文件,里面保存域名配置信息
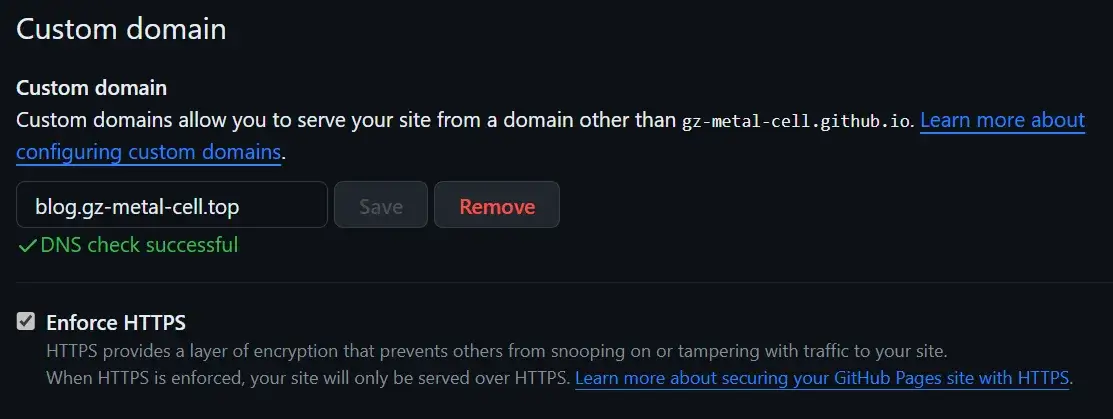
等待 DNS check successful,顺便把 Enforce HTTPS 也开了。
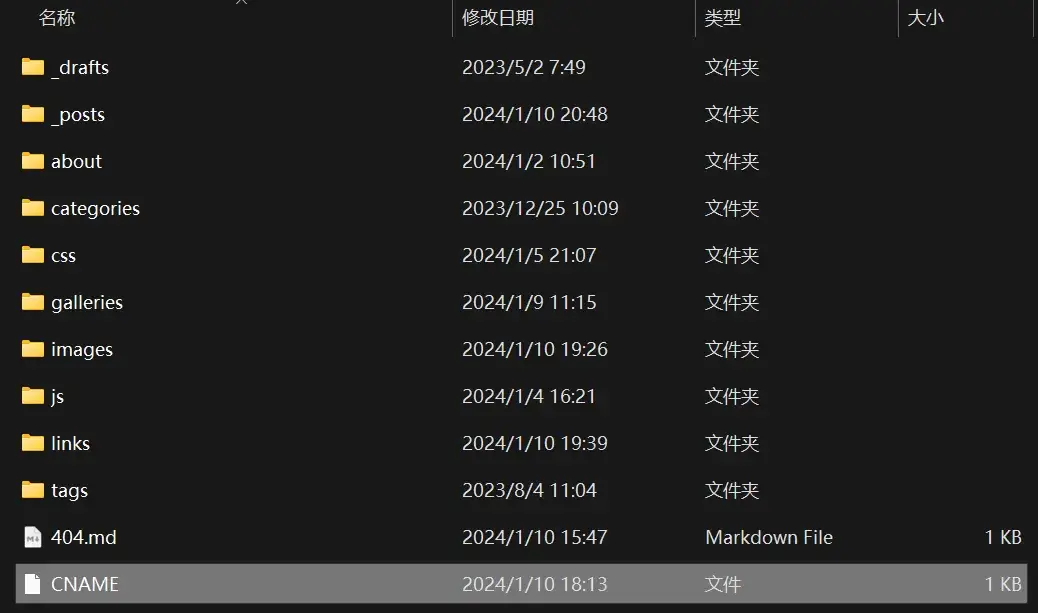
仓库根目录就会创建一个 CNAME 文件,内容即为 blog.gz-metal-cell.top,这个文件在本地 source/ 下也转存一份,不然每次推送这个 CNAME 又会没了……
现在,访问 https://gz-metal-cell.github.io 会自动跳转至 https://blog.gz-metal-cell.top/,就可以绕开冀大的防火墙了,真是太棒了!
图片懒加载
pro 神这么说道:
懒加载又称延迟加载。开启后,当图片或评论插件滚动到可见范围内才会加载,可以大幅提高打开网页的速度。
1.新增
hexo-lazyload-image模块shell npm install hexo-lazyload-image --save2.在主目录配置文件
_config.yml增加配置yaml # 图片懒加载 lazyload: enable: true onlypost: false # optional loadingImg: /images/loading.webp # optional eg ./images/loading.gif isSPA: false # optional preloadRatio: 5 # optional, default is 1
从 loading GIF 图片生成 loading GIF 图片 在线 loading 图片制作工具 intoGIF 整一个 loading 的 gif,再 PS 调一调,再 GIF 转 WEBP - 在线转换图像文件 (aconvert.com) 转成 webp 格式,看起来不错,只要 12 KB!
进主题,把图标啥的小图片打上 no-lazy 标签,我们并不需要懒加载这些内容:
<img no-lazy src="XXX" />与 Masonry 冲突
解决一下懒加载与 Masonry · Layout (desandro.com) 布局的冲突,原本是这么处理的:
// layout Masonry after each image loads
$grid.imagesLoaded().progress(function() {
    $grid.masonry();
});
改成:
window.imageLazyLoadSetting = {
    onImageLoaded: function() {
    $grid.masonry();
    }
};
这样懒加载就能与瀑布流插件 Masonry 所兼容!
与 fancybox 冲突
这个插件的原理是把 img 的 src 改成 data-original,因此需要修改创建 fancybox 的逻辑:
$('#article img').each(function () {
    if ($(this).parent().hasClass('fancybox')) return;
    if ($(this).hasClass('no-fancybox')) return;
    var alt = this.alt;
    $(this).wrap(
        '<a ' +
            'class="fancybox"' +
            'href="' + ($(this).attr('data-original') == null ? this.src : $(this).attr('data-original')) +
            '"data-caption="' + alt + '"' +
            'data-fancybox="gallery"' +
            'data-thumb='+ ($(this).attr('data-original') == null ? this.src :$(this).attr('data-original')) + '>' +
        '</a>');
});
其他工具
ChatGPT 这么说道:
要使用 Python 将 PNG 文件转换为 WebP 格式,你可以使用 Pillow 库。请确保你已经安装了 Pillow 库。
以下是一个简单的示例代码:
python from PIL import Image def convert_png_to_webp(input_path, output_path): # 打开 PNG 文件 image = Image.open(input_path) # 将 PNG 文件转换为 WebP 格式 image.save(output_path, "webp") # 调用函数进行转换 convert_png_to_webp("input.png", "output.webp")在上面的代码中,
convert_png_to_webp函数接受输入路径(PNG 文件)和输出路径(WebP 文件),并将 PNG 文件转换为 WebP 格式。请注意,使用 WebP 格式需要安装 libwebp 库。如果你在使用 Pillow 之前没有安装 libwebp 库,你可能会遇到错误。你可以根据你的操作系统和 Python 版本选择合适的安装方法。
pro 神这么说道: