资源
课程
01-Pixi 初识和搭建 Pixi 应用
{% tabs 01_2%}
- 装一个最新的 Node.js (nodejs.org)
- 任意路径下命令行全局安装
Vue CLI:
npm install -g @vue/cli- 全局安装
yarn:
npm install --g yarn- 项目文件下命令行创建
Vue项目(好家伙这就 100 来 MB……):
vue create 01-pixiapp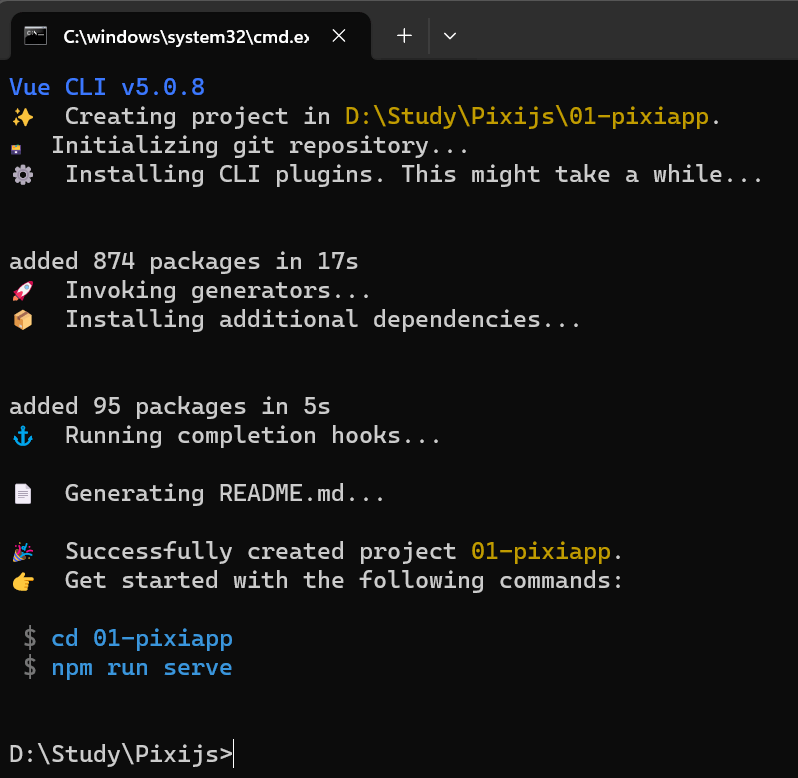
- 转到这个项目:
cd 01-pixiapp- 安装
pixi.js:
yarn add pixi.js- 启动项目:
yarn serve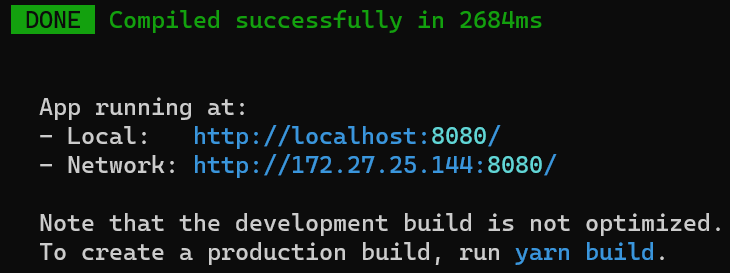
- 编辑
01-pixiapp/App.vue:
<template>
    <div></div>
</template>

<script setup>
// 导入 pixi.js
import * as PIXI from 'pixi.js';

// 创建应用
const app = new PIXI.Application({
    width: window.innerWidth,
    height: window.innerHeight,
    backgroundColor: 0x1099bb,
    resolution: window.devicePixelRatio || 1,
})

// 将应用画布添加到 DOM 中
document.body.appendChild(app.view);

// 创建一个矩形
const rectangle = new PIXI.Graphics();
rectangle.beginFill(0x66ccff);  // 填充颜色
rectangle.drawRect(200, 200, 164, 64);  // 绘制矩形
rectangle.endFill();  // 结束填充

// 将矩形添加至舞台
app.stage.addChild(rectangle);

</script>

<style>
* {
    margin: 0;
    padding: 0;
    box-sizing: border-box;
}
canvas {
    width: 100vw;
    height: 100vh;
    position: fixed;
    left: 0;
}
</style>
HTML 下使用 <script src="https://pixijs.download/release/pixi.js"></script> 直接导入 pixi.js
<!DOCTYPE html>
<html lang="en">
<head>
    <meta charset="UTF-8">
    <meta name="viewport" content="width=device-width, initial-scale=1.0">
    <title>Document</title>
    <style>
        * {
            margin: 0;
            padding: 0;
            box-sizing: border-box;
        }
        canvas {
            width: 100vw;
            height: 100vh;
            position: fixed;
            left: 0;
        }
    </style>
</head>
<body>
</body>
<script src="https://pixijs.download/release/pixi.js"></script>
<script>
// 创建应用
const app = new PIXI.Application({
    width: window.innerWidth,
    height: window.innerHeight,
    backgroundColor: 0x1099bb,
    resolution: window.devicePixelRatio || 1,
})

// 将应用画布添加到 DOM 中
document.body.appendChild(app.view);

// 创建一个矩形
const rectangle = new PIXI.Graphics();
rectangle.beginFill(0x66ccff);  // 填充颜色
rectangle.drawRect(200, 200, 164, 64);  // 绘制矩形
rectangle.endFill();  // 结束填充

// 将矩形添加至舞台
app.stage.addChild(rectangle);
</script>
</html>
{% endtabs %}
Vue 代码解释:
{% tabs 01_2 %}
这部分定义了组件的 HTML 结构。在这个例子中,模板仅包含一个空的 <div> 元素。实际上,这个 <div> 在此示例中未直接使用,因为 PixiJS 的画布 (canvas) 是通过脚本直接添加到 document.body 中的,而不是被插入到这个 <div> 内。
<template>
    <div></div>
</template>
这部分是组件的 JavaScript 逻辑,主要做了以下几件事情:
- 导入 PixiJS:使用
import语句导入 PixiJS 库。 - 创建 PixiJS 应用:实例化一个新的 PixiJS
Application对象,并设置其大小和背景颜色等属性。这个应用对象会自动生成一个<canvas>元素。 - 将
<canvas>元素添加到 DOM:通过document.body.appendChild(app.view);将 PixiJS 创建的<canvas>元素添加到 HTML 文档的<body>中。 - 绘制图形:使用 PixiJS 的
Graphics类创建一个矩形,并设置其填充颜色和位置,最后将这个矩形添加到 PixiJS 应用的舞台(stage)上,以便显示。
<script setup>
// 导入 pixi.js
import * as PIXI from 'pixi.js';

// 创建应用
const app = new PIXI.Application({
    width: window.innerWidth, // 宽度设置为窗口宽度
    height: window.innerHeight, // 高度设置为窗口高度
    backgroundColor: 0x1099bb, // 背景颜色设置为浅蓝色
    resolution: window.devicePixelRatio || 1, // 分辨率设置为设备的像素比或默认值 1
})

// 将应用画布添加到 DOM 中
document.body.appendChild(app.view);

// 创建一个矩形
const rectangle = new PIXI.Graphics();
rectangle.beginFill(0x66ccff);  // 开始填充颜色为浅蓝色
rectangle.drawRect(200, 200, 164, 64);  // 在坐标 (200, 200) 处绘制一个 164 x 64 大小的矩形
rectangle.endFill();  // 结束填充

// 将矩形添加至舞台
app.stage.addChild(rectangle);
</script>
这部分定义了页面的 CSS 样式:
- 重置所有元素的
margin和padding,并设置box-sizing为border-box,以确保布局的一致性。 - 设置
<canvas>元素的样式,使其宽度和高度分别占满视口的宽度和高度,并通过position: fixed确保<canvas>始终覆盖整个视口。
<style>
* {
    margin: 0;
    padding: 0;
    box-sizing: border-box;
}
canvas {
    width: 100vw;
    height: 100vh;
    position: fixed;
    left: 0;
}
</style>
{% endtabs %}
打开 http://localhost:8080/:

02-Pixi图形Graphics具体应用
使用 Pixi 创建其它图形,设置:
- 缩放:
scale.set() - 位移:
position.set() - 旋转:
rotation - 锚点:
pivot.set()
// 创建应用
const app = new PIXI.Application({
width: window.innerWidth,
height: window.innerHeight,
backgroundColor: 0x1099bb,
resolution: window.devicePixelRatio || 1,
antialias: true, // 设置抗锯齿
})
// 将应用画布添加到 DOM 中
document.body.appendChild(app.view);
// 创建一个矩形
const rectangle = new PIXI.Graphics();
rectangle.lineStyle(4, 0xff0000, 1); // 设置边框样式:线宽,线颜色,透明度
rectangle.beginFill(0x66ccff, 0.9); // 填充颜色
rectangle.drawRect(0, 0, 164, 64); // 绘制矩形
rectangle.endFill(); // 结束填充
// 图形的缩放
rectangle.scale.set(2, 2);
// 图形的位移
rectangle.position.set(100, 100);
// 图形的旋转
rectangle.rotation = 0.5;
// 图形的锚点
rectangle.pivot.set(82, 32);
// 将矩形添加至舞台
app.stage.addChild(rectangle);
// 创建一个圆形
const circle = new PIXI.Graphics();
circle.beginFill(0x66ccff, 0.9);
circle.drawCircle(0, 0, 32);
circle.endFill();
circle.position.set(300, 300);
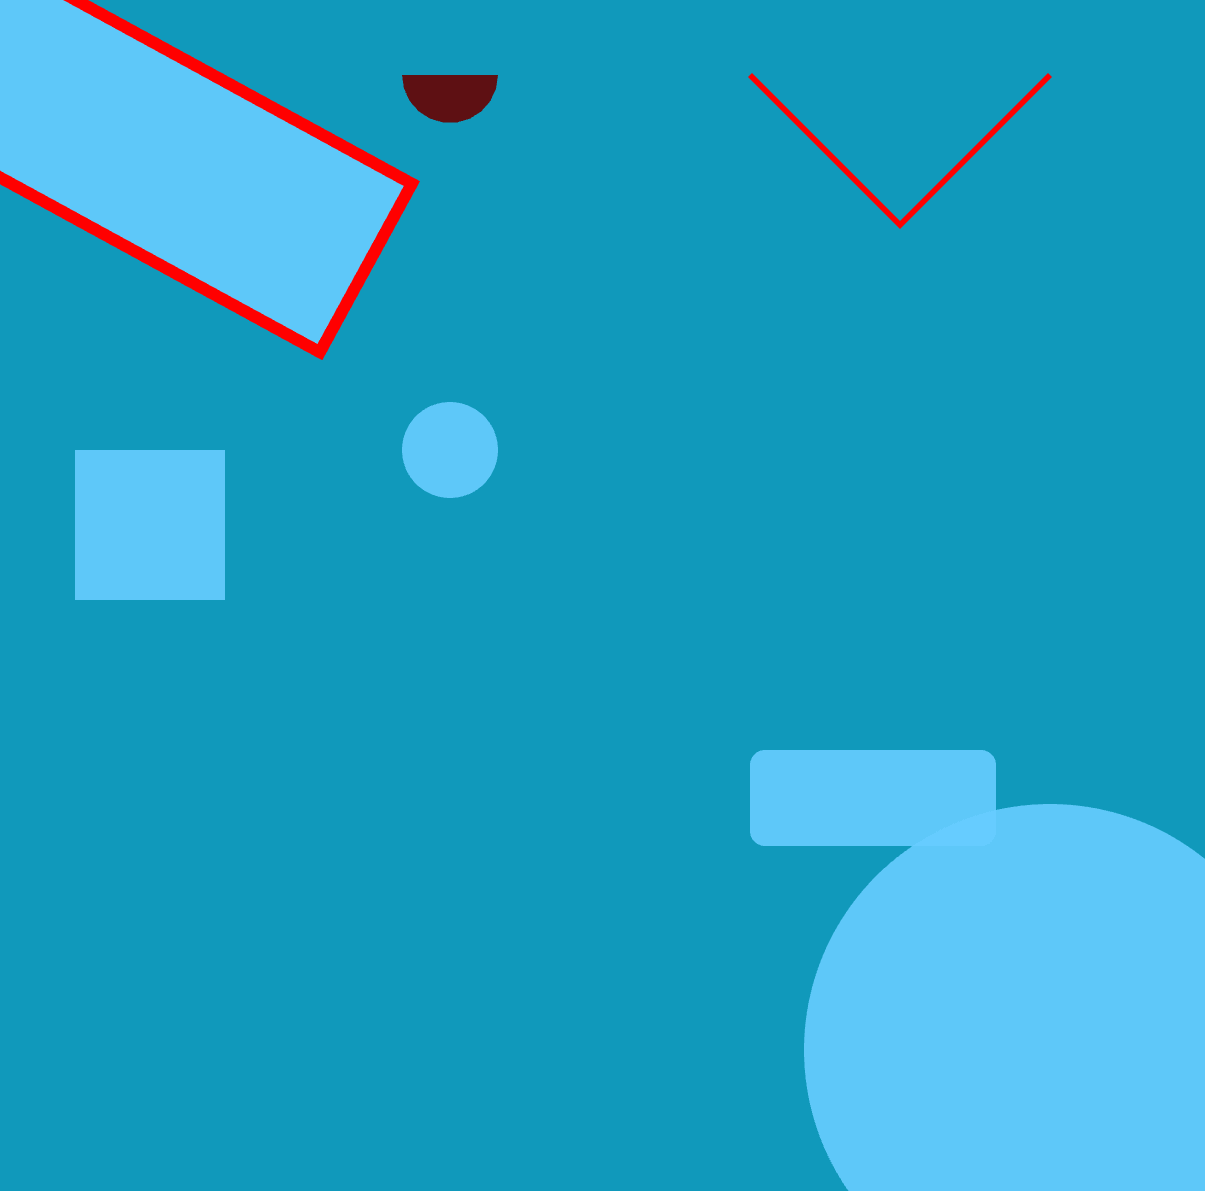
app.stage.addChild(circle);03-Pixi绘制各种常见图形
{% tabs 02 %}
// 创建一个矩形
const rectangle = new PIXI.Graphics();
rectangle.lineStyle(4, 0xff0000, 1);  // 设置边框样式:线宽,线颜色,透明度
rectangle.beginFill(0x66ccff, 0.9);  // 填充颜色
rectangle.drawRect(0, 0, 164, 64);  // 绘制矩形
rectangle.endFill();  // 结束填充
// 图形的缩放
rectangle.scale.set(2, 2);
// 图形的位移
rectangle.position.set(100, 100);
// 图形的旋转
rectangle.rotation = 0.5;
// 图形的锚点
rectangle.pivot.set(82, 32);
// 将矩形添加至舞台
app.stage.addChild(rectangle);// 创建一个圆形
const circle = new PIXI.Graphics();
circle.beginFill(0x66ccff, 0.9);
circle.drawCircle(0, 0, 32);
circle.endFill();
circle.position.set(300, 300);
app.stage.addChild(circle);// 创建圆角矩形
const roundedRectangle = new PIXI.Graphics();
roundedRectangle.beginFill(0x66ccff, 0.9);
/* 绘制圆角矩形,
第一个参数是 x 坐标,
第二个参数是 y 坐标,
第三个参数是宽度,
第四个参数是高度,
第五个参数是圆角半径
*/
roundedRectangle.drawRoundedRect(0, 0, 164, 64, 10);
roundedRectangle.endFill();
roundedRectangle.position.set(500, 500);
app.stage.addChild(roundedRectangle);// 绘制椭圆
const ellipse = new PIXI.Graphics();
ellipse.beginFill(0x66ccff, 0.9);
/* 绘制椭圆,
第一个参数是 x 坐标,
第二个参数是 y 坐标,
第三个参数是宽度,
第四个参数是高度
*/
ellipse.drawEllipse(0, 0, 164, 164);
ellipse.endFill();
ellipse.position.set(700, 700);
app.stage.addChild(ellipse);// 绘制多边形
const polygon = new PIXI.Graphics();
polygon.beginFill(0x66ccff, 0.9);
// 绘制多边形,参数是一个数组,数组中的每个元素是一个点的坐标,每两个元素是一个点的 x 坐标和 y 坐标。
polygon.drawPolygon([0, 0, 100, 0, 100, 100, 0, 100]);
polygon.endFill();
polygon.position.set(50, 300);
app.stage.addChild(polygon);// 绘制圆弧(扇形)
const arc = new PIXI.Graphics();
arc.beginFill(0x660000, 0.9);
/* 绘制圆弧,
第一个参数是 x 坐标,
第二个参数是 y 坐标,
第三个参数是半径,
第四个参数是起始角度,
第五个参数是结束角度。
第六个参数是是否逆时针
*/
arc.arc(0, 0, 32, 0, Math.PI, false);
arc.endFill();
arc.position.set(300, 50);
app.stage.addChild(arc);// 绘制线段
const line = new PIXI.Graphics();
line.lineStyle(4, 0xff0000, 1);
line.moveTo(0, 0); // 设置线段的起始点
line.lineTo(100, 100); // 设置线段的结束点
line.lineTo(200, 0);
line.position.set(500, 50);
app.stage.addChild(line);{% endtabs %}
04-Pixi纹理与动画实现
使用代码创建一个木剑的旋转动画:
// 创建应用
const app = new PIXI.Application({
    width: window.innerWidth,
    height: window.innerHeight,
    backgroundColor: 0x1099bb,
    resolution: window.devicePixelRatio || 1,
    antialias: true,  // 设置抗锯齿
})

// 将应用画布添加到 DOM 中
document.body.appendChild(app.view);

// 创建一个纹理
const texture = PIXI.Texture.from("./textures/mujian.png");

// 创建一个精灵
const sprite = new PIXI.Sprite(texture);

// 设置精灵的锚点
sprite.anchor.set(0.5, 0.5);

// 设置精灵的位置
sprite.x = app.screen.width / 2;
sprite.y = app.screen.height / 2;

// 设置精灵旋转 45 度
sprite.rotation = Math.PI / 4;

// 设置精灵的缩放
sprite.scale.set(2, 2);

// 设置精灵的透明度
sprite.alpha = 0.5;

app.stage.addChild(sprite);

// ticker 实现动画
app.ticker.add((delta) => {
    console.log(delta);
    sprite.rotation += 0.01 * delta;
})05-Pixi事件交互
在上一节的代码上,继续追加交互的代码:
{% tabs 05 %}
sprite.interactive = true;
sprite.on("click", () => {
    sprite.alpha = 1;
});sprite.on("pointerenter", () => {
sprite.alpha = 0.75;
});sprite.on("pointerout", () => {
sprite.alpha = 0.5;
});{% endtabs %}
如下所示,当鼠标点击 / 移入 / 移出 木剑时,将产生一定的交互效果。
06-Pixi资源管理
两种不同的资源加载方式:
{% tabs 06 %}
// 添加资源
PIXI.Assets.add("sword", "./textures/jian.png");
PIXI.Assets.add("man", "./textures/man.png");
PIXI.Assets.add("woodenSword", "./textures/mujian.png");

// 异步加载资源
const texturesPromise = PIXI.Assets.load(["sword", "man", "woodenSword"], (progress) => {
    console.log("加载完成:", progress);
});// 添加场景一资源
PIXI.Assets.addBundle("scene1", {
sword: "./textures/jian.png",
man: "./textures/man.png",
woodenSword: "./textures/mujian.png",
});
const texturesPromise = PIXI.Assets.loadBundle("scene1", (progress) => {
console.log("加载完成:", progress);
});{% endtabs %}
操作一下所创建的资源对象 texturesPromise:
// 加载完成后创建精灵
texturesPromise.then((textures) => {
    // 创建容器
    const container = new PIXI.Container();
    // 创建精灵
    const sprite = new PIXI.Sprite(textures.sword);
    // 设置精灵位置
    sprite.x = app.screen.width / 2;
    sprite.y = app.screen.height / 2;
    // 设置精灵锚点
    sprite.anchor.set(0.5);
    // 设置精灵缩放
    sprite.scale.set(0.5);
    // 设置精灵透明度
    sprite.alpha = 0.5;
    // 设置精灵旋转
    sprite.rotation = 0.5;
    // 设置精灵混合模式
    sprite.blendMode = PIXI.BLEND_MODES.ADD;
    // 设置精灵交互
    sprite.interactive = true;
    // 设置精灵鼠标样式
    sprite.buttonMode = true;
    // 设置精灵鼠标事件
    sprite.on("pointerdown", () => {
        console.log("pointerdown");
    });
    container.addChild(sprite);

    // 创建精灵
    const sprite2 = new PIXI.Sprite(textures.man);
    sprite2.scale.set(0.1);
    container.addChild(sprite2);
    app.stage.addChild(container);
});07-Pixi文字与遮罩
new PIXI.Text() 创建文字对象:
// 显示 hello world 文字
const text = new PIXI.Text("Hello World", {
    fontFamily: "Arial",
    fontSize: 120,
    fill: 0xff0000,
    align: "center",
});

// 设置文字位置
text.x = app.screen.width / 2;
text.y = app.screen.height / 2;

// 设置文字锚点
text.anchor.set(0.5);
app.stage.addChild(text);mask 给精灵设置另一个精灵做遮罩:
// 创建一个精灵
const bg = PIXI.Sprite.from("./textures/bg.png");
bg.width = app.screen.width;
bg.height = app.screen.height;
// 使用文字作为精灵的遮罩
bg.mask = woodenSword;
app.stage.addChild(bg);
app.stage.addChild(woodenSword);使用文字作为遮罩:
// 显示 hello world 文字
const text = new PIXI.Text("Hello World", {
    fontFamily: "Arial",
    fontSize: 120,
    fill: 0xff0000,
    align: "center",
});

// 设置文字位置
text.x = app.screen.width / 2;
text.y = app.screen.height / 2;

// 设置文字锚点
text.anchor.set(0.5);

// 创建一个精灵
const bg = PIXI.Sprite.from("./textures/bg.png");
bg.width = app.screen.width;
bg.height = app.screen.height;
// 使用文字作为精灵的遮罩
bg.mask = text;
app.stage.addChild(bg);08-Pixi滤镜特效
先创建一个精灵用于操作:
// 创建一个纹理
const texture = PIXI.Texture.from("./textures/mujian.png");
// 创建一个精灵
const sprite = new PIXI.Sprite(texture);
// 设置精灵的位置
sprite.x = app.screen.width / 2;
sprite.y = app.screen.height / 2;

// 设置精灵的锚点
sprite.anchor.set(0.5);

// 将精灵添加至舞台
app.stage.addChild(sprite);
自带滤镜:模糊
// 创建模糊滤镜
const blurFilter = new PIXI.BlurFilter();
// 设置模糊滤镜的模糊程度
blurFilter.blur = 20;
// 将模糊滤镜添加到精灵上
sprite.filters = [blurFilter];

// 监听鼠标是否进入精灵
sprite.interactive = true;
sprite.on("pointerover", () =>{
    // 设置模糊滤镜的模糊程度
    blurFilter.blur = 0;
});
sprite.on("pointerout", () =>{
    // 设置模糊滤镜的模糊程度
    blurFilter.blur = 20;
});pixi-filters:扩展滤镜:轮廓与辉光
- 更多滤镜——pixijs/filters: Collection of community-authored custom display filters for PixiJS (github.com)
{% tabs 08 %}
使用:
yarn add pixi-filters安装,然后使用
import {XXXFilter} from "pixi-filters";来导入。
Vue 下输入代码:
<template>
    <div></div>
</template>

<script setup>
// 导入 pixi.js
import * as PIXI from 'pixi.js';
import {OutlineFilter}  from 'pixi-filters';
import {GlowFilter}  from 'pixi-filters';

// 创建应用
const app = new PIXI.Application({
    width: window.innerWidth,
    height: window.innerHeight,
    backgroundColor: 0x1099bb,
    resolution: window.devicePixelRatio || 1,
    antialias: true,  // 设置抗锯齿
})

// 将应用画布添加到 DOM 中
document.body.appendChild(app.view);

// 创建一个纹理
const texture = PIXI.Texture.from("./textures/mujian.png");
// 创建一个精灵
const sprite = new PIXI.Sprite(texture);
// 设置精灵的位置
sprite.x = app.screen.width / 2;
sprite.y = app.screen.height / 2;

// 设置精灵的锚点
sprite.anchor.set(0.5);

// 将精灵添加到舞台
app.stage.addChild(sprite);

//创建轮廓滤镜
const outlineFilter = new OutlineFilter(5, 0xffff00); // 2 为轮廓宽度,0x000000 为轮廓颜色
// 创建发光滤镜
const glowFilter = new GlowFilter({
  distance: 50,
  outerStrength: 1,
  innerStrength: 0,
  color: 0xff0000,
  quality: 0.5,
});
// 将轮廓滤镜添加到精灵上
sprite.filters = [outlineFilter, glowFilter];

</script>

<style>
* {
    margin: 0;
    padding: 0;
    box-sizing: border-box;
}
canvas {
    width: 100vw;
    height: 100vh;
    position: fixed;
    left: 0;
}
</style><script src="https://cdn.jsdelivr.net/npm/pixi-filters@latest/dist/browser/pixi-filters.min.js"></script>HTML 下使用代码(将 OutlineFilter 和 GlowFilter 分别改为 new PIXI.filters.OutlineFilter 和 PIXI.filters.GlowFilter):
// 创建应用
const app = new PIXI.Application({
    width: window.innerWidth,
    height: window.innerHeight,
    backgroundColor: 0x1099bb,
    resolution: window.devicePixelRatio || 1,
    antialias: true,  // 设置抗锯齿
})

// 将应用画布添加到 DOM 中
document.body.appendChild(app.view);

// 创建一个纹理
const texture = PIXI.Texture.from("./textures/mujian.png");
// 创建一个精灵
const sprite = new PIXI.Sprite(texture);
// 设置精灵的位置
sprite.x = app.screen.width / 2;
sprite.y = app.screen.height / 2;

// 设置精灵的锚点
sprite.anchor.set(0.5);

// 将精灵添加到舞台
app.stage.addChild(sprite);

//创建轮廓滤镜
const outlineFilter = new PIXI.filters.OutlineFilter(5, 0xffff00); // 2为轮廓宽度,0x000000为轮廓颜色
// 创建发光滤镜
const glowFilter = new PIXI.filters.GlowFilter({
  distance: 50,
  outerStrength: 1,
  innerStrength: 0,
  color: 0xff0000,
  quality: 0.5,
});
//将轮廓滤镜添加到精灵上
sprite.filters = [outlineFilter, glowFilter];
{% endtabs %}
09-应用Pixi实现波浪水滴特效主页
创建场景:一个背景以及一个带阴影的文字对象。
// 创建应用
const app = new PIXI.Application({
  width: window.innerWidth,
  height: window.innerHeight,
  backgroundColor: 0x1099bb,
  resolution: window.devicePixelRatio || 1,
  antialias: true, // 抗锯齿
});

// 将应用画布添加到DOM中
document.body.appendChild(app.view);

// 创建一个纹理
const texture = PIXI.Texture.from("./textures/car.jpg");
// 创建一个精灵
const sprite = new PIXI.Sprite(texture);
sprite.width = app.screen.width;
sprite.height = app.screen.height;

// 创建容器
const container = new PIXI.Container();
// 将精灵添加到容器中
container.addChild(sprite);
// 将容器添加到舞台
app.stage.addChild(container);

// 添加文字
const text = new PIXI.Text("Hello PixiJS", {
  fontFamily: "Arial",
  fontSize: 30 + Math.floor(app.screen.width * 0.1),
  fill: 0xffffff,
  align: "center",
  dropShadow: true,
  dropShadowColor: "#000000",
  dropShadowBlur: 4,
  dropShadowAngle: Math.PI / 2,
  dropShadowDistance: 2,
});
text.x = app.screen.width / 2;
text.y = app.screen.height / 2;
text.anchor.set(0.5);
container.addChild(text);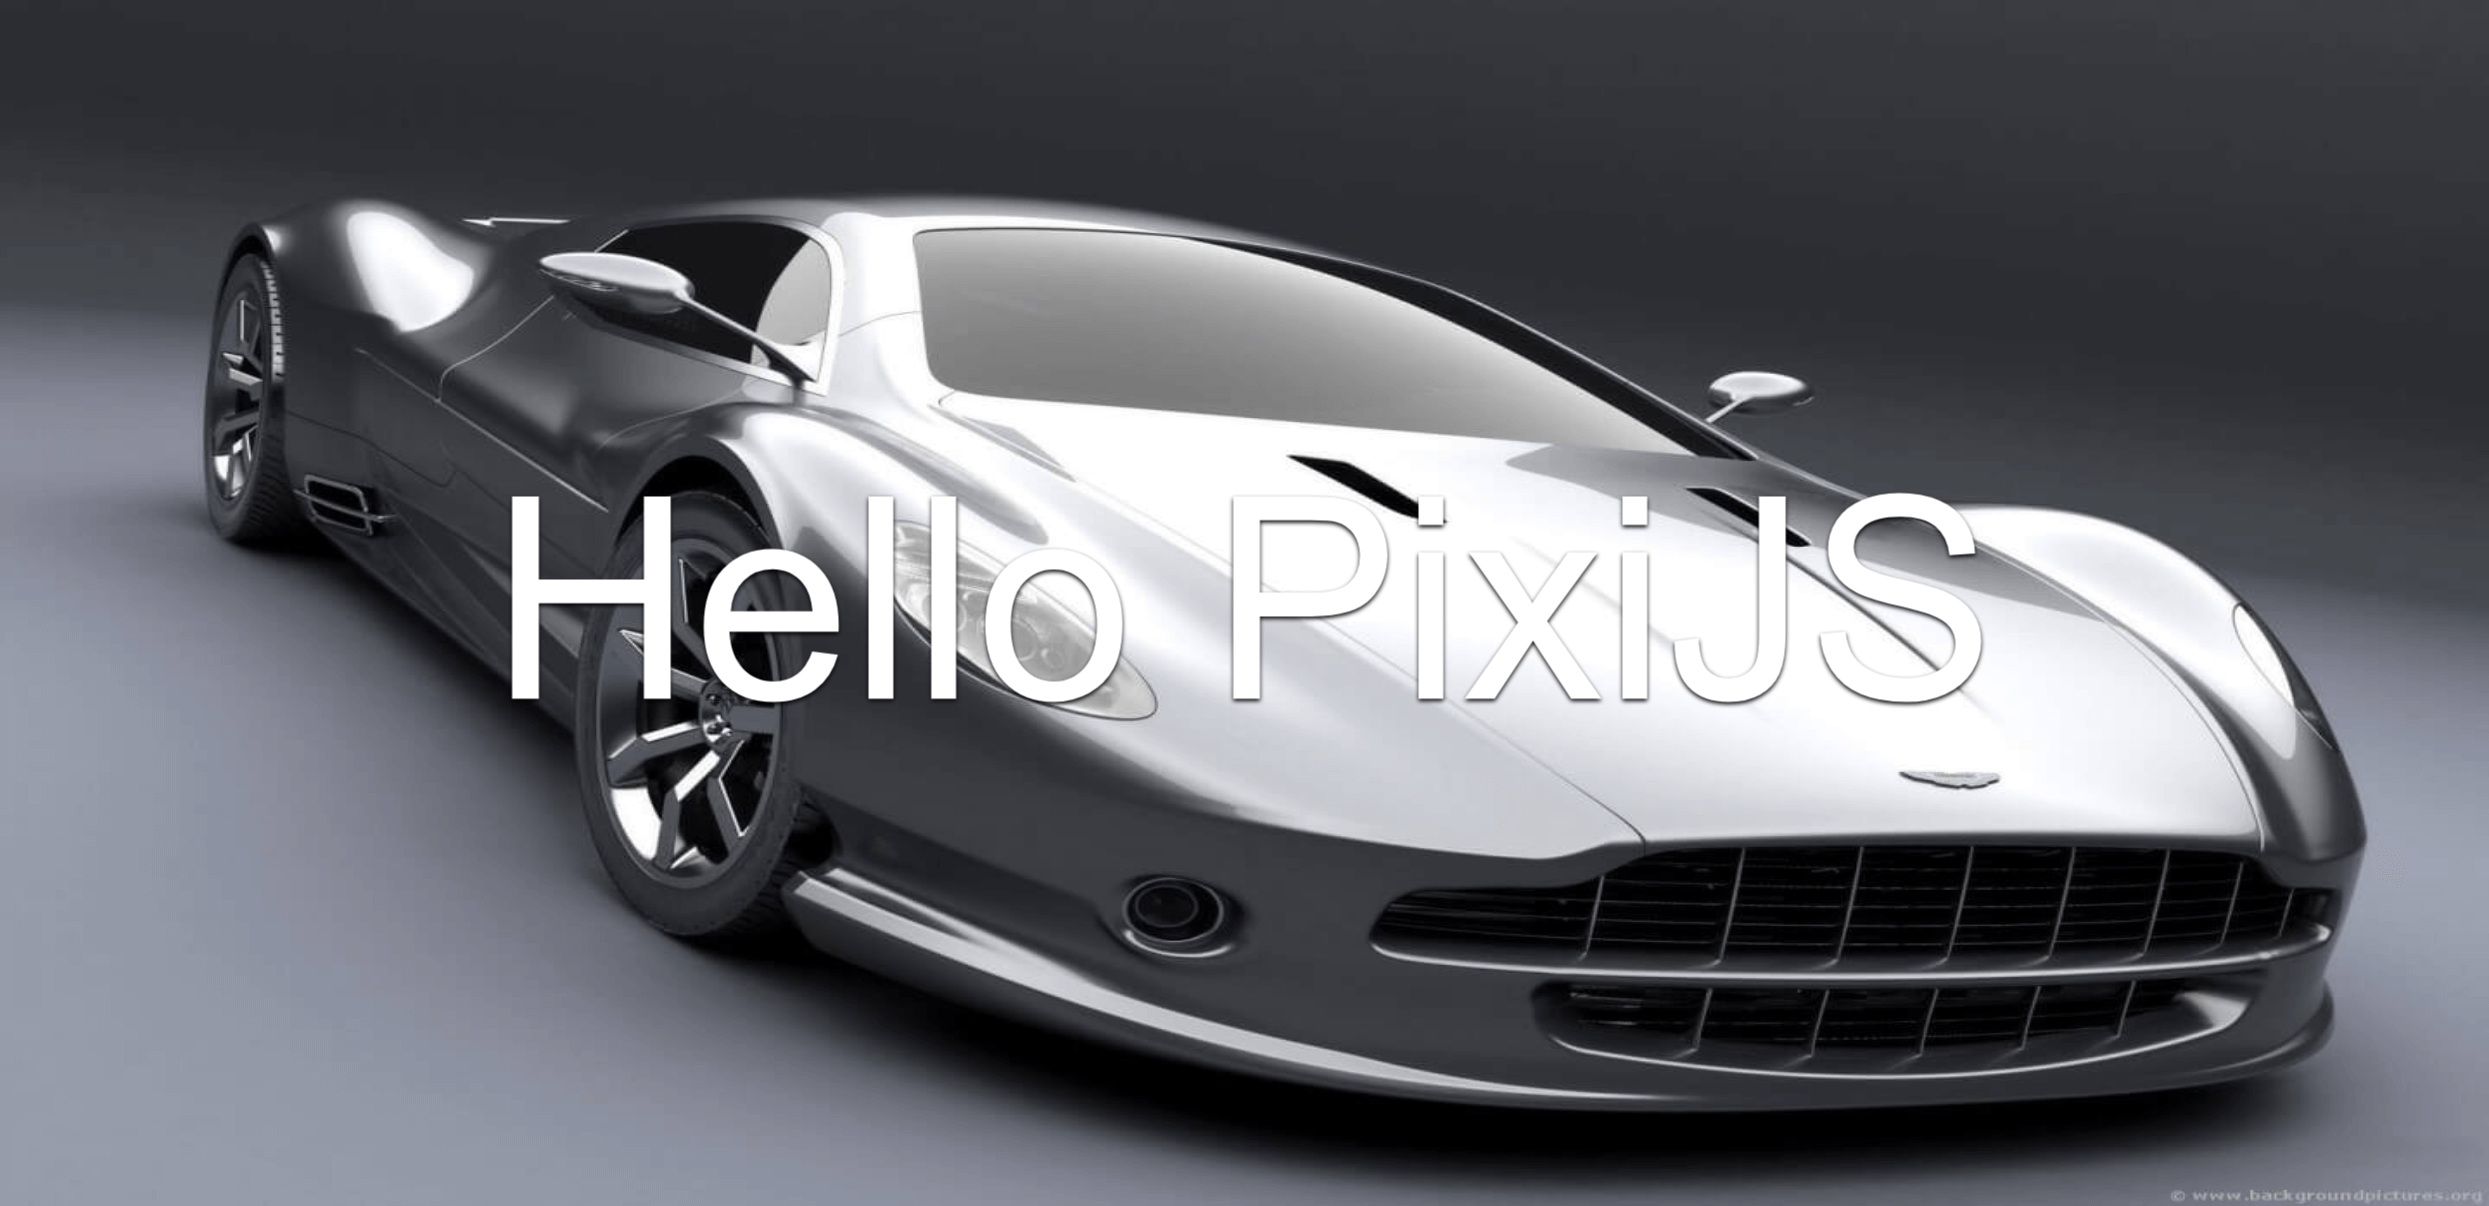
添加置换滤镜:
// 添加置换滤镜
const displacementSprite = PIXI.Sprite.from("./textures/displacement.jpg");
displacementSprite.scale.set(0.5);
displacementSprite.texture.baseTexture.wrapMode = PIXI.WRAP_MODES.REPEAT;
const displacementFilter = new PIXI.DisplacementFilter(displacementSprite);
container.addChild(displacementSprite);
一个置换图 displacement.jpg 实现画面涟漪的效果:
定义大、中、小三种震波滤镜(需要pixi-filter 支持):
// 添加震波滤镜
const shockwaveFilter1 = new PIXI.filters.ShockwaveFilter(
  [Math.random() * app.screen.width, Math.random() * app.screen.height],
  {
    radius: 80, //半径
    waveLength: 40, //波长
    amplitude: 40, //振幅
    speed: 200,
  },
  0
);

const shockwaveFilter2 = new PIXI.filters.ShockwaveFilter(
  [Math.random() * app.screen.width, Math.random() * app.screen.height],
  {
    radius: 100, //半径
    waveLength: 45, //波长
    amplitude: 80, //振幅
    speed: 240,
  },
  0
);

const shockwaveFilter3 = new PIXI.filters.ShockwaveFilter(
  [Math.random() * app.screen.width, Math.random() * app.screen.height],
  {
    radius: 160, //半径
    waveLength: 65, //波长
    amplitude: 105, //振幅
    speed: 300,
  },
  0
);应用这些滤镜(app.ticker.add 有点像 Unity 里的 Update()):
container.filters = [
  displacementFilter,
  shockwaveFilter1,
  shockwaveFilter2,
  shockwaveFilter3,
];
随机创建震波滤镜:
app.ticker.add((delta) => {
  displacementSprite.x += 1;
  displacementSprite.y += 1;
  createWave(shockwaveFilter1, 1);
  createWave(shockwaveFilter2, 1.2);
  createWave(shockwaveFilter3, 0.7);
});

function createWave(waveFilter, resetTime) {
  waveFilter.time += 0.01;
  if (waveFilter.time > resetTime) {
    waveFilter.time = 0;
    waveFilter.center = [
      Math.random() * app.screen.width,
      Math.random() * app.screen.height,
    ];
  }
}
设置点击创建震波滤镜的效果:
// 监听点击事件,根据位置创建震波滤镜
app.view.addEventListener("click", (e) => {
  console.log(e.clientX, e.clientY);
  shockwaveFilter3.center = [e.clientX, e.clientY];
  shockwaveFilter3.time = 0;
});10-pixijs开发谷歌恐龙跑酷小游戏
我在原教程的基础上魔改了一些内容。
创建应用,导入 baseTexture(是一个雪碧图):

// 创建应用
const app = new PIXI.Application({
    width: window.innerWidth,
    height: window.innerHeight,
    backgroundColor: 0xffffff,
    resolution: window.devicePixelRatio || 1,
    antialias: true, // 抗锯齿
});

// 将应用画布添加到DOM中
document.body.appendChild(app.view);

// 创建容器
const container = new PIXI.Container();

// 将容器添加到舞台
app.stage.addChild(container);

// 添加恐龙小游戏的精灵纹理
const baseTexture = PIXI.BaseTexture.from("./textures/game.png");
设置恐龙的宽高:
const frameWidth = 88;
const frameHeight = 100;
创建各种资源:
{% tabs 10 %}
// 创建恐龙纹理
const dinoTexture = new PIXI.Texture(
    baseTexture,
    new PIXI.Rectangle(75, 0, frameWidth, frameHeight)
);
// 创建恐龙精灵
const dino = new PIXI.Sprite(dinoTexture);
dino.visible = false;
container.addChild(dino);// 恐龙跑步动画;
const runTexture = new PIXI.Texture(
baseTexture,
new PIXI.Rectangle(1675, 0, frameWidth, frameHeight)
);
const runSprite = new PIXI.Sprite(runTexture);
runSprite.visible = false;
container.addChild(runSprite);
let runTextures = [];
for (let i = 0; i < 2; i++) {
runTextures.push(
new PIXI.Texture(
baseTexture,
new PIXI.Rectangle(1680 + (2 + i) * frameWidth, 0, 82, frameHeight)
)
);
}
const runAnimation = new PIXI.AnimatedSprite(runTextures);
runAnimation.animationSpeed = 0.1;
runAnimation.play();
runAnimation.visible = false;
container.addChild(runAnimation);// 恐龙死亡动画;
let deadTextures = [];
for (let i = 0; i < 2; i++) {
deadTextures.push(
new PIXI.Texture(
baseTexture,
new PIXI.Rectangle(1680 + (0 + i) * frameWidth, 0, 82, frameHeight)
)
);
}
const deadAnimation = new PIXI.AnimatedSprite(deadTextures);
deadAnimation.animationSpeed = 0.1;
deadAnimation.play();
deadAnimation.visible = false;
container.addChild(deadAnimation);// 恐龙跳跃精灵
const jumpTexture = new PIXI.Texture(
baseTexture,
new PIXI.Rectangle(1680, 0, 82, frameHeight)
);
const jumpSprite = new PIXI.Sprite(jumpTexture);
jumpSprite.visible = false;
container.addChild(jumpSprite);// 地面精灵
const groundTexture = new PIXI.Texture(
baseTexture,
new PIXI.Rectangle(50, 100, 2300, 30)
);
// 设置纹理水平镜像重复
groundTexture.baseTexture.wrapMode = PIXI.WRAP_MODES.REPEAT;
const groundSprite = new PIXI.TilingSprite(groundTexture);
groundSprite.width = window.innerWidth;
groundSprite.height = 30;
// 设置地面精灵的位置
groundSprite.position.set(0, window.innerHeight - 50);
container.addChild(groundSprite);// 仙人掌精灵
const cactusTexture = new PIXI.Texture(
baseTexture,
new PIXI.Rectangle(515, 0, 30, 60)
);
const cactusSprite = new PIXI.Sprite(cactusTexture);
cactusSprite.x = getRandomInt(window.innerWidth, window.innerWidth * 1.5);
cactusSprite.y = window.innerHeight - 50 - 50;
container.addChild(cactusSprite);{% endtabs %}
创建提示文字,点击 开始游戏 时,开始游戏:
// 创建文字
let hintsText = new PIXI.Text("开始游戏", {
    fontSize: 30,
    fill: 0x333333,
    align: "center",
});
hintsText.x = app.screen.width / 2;
hintsText.y = app.screen.height / 2;
hintsText.anchor.set(0.5);
container.addChild(hintsText);
hintsText.interactive = true;
hintsText.on("click", () => {
    playGame();
});
hintsText.addEventListener('touchstart', function (event) {
    playGame();
});
开始游戏的逻辑:
let isGameing = false;
let score = 0;
let jumpVelocity = 1200; // 跳跃初速度,单位:像素/秒
let gravity = 5000; // 重力加速度,单位:像素/秒^2

// 开始游戏
function playGame(e) {
    hintsText.text = "得分:" + score;
    // 恐龙跑步动画;
    runAnimation.x = 60;
    runAnimation.y = window.innerHeight - 50 - frameHeight;
    runAnimation.visible = true;
    // 恐龙死亡动画;
    deadAnimation.x = 60;
    deadAnimation.y = window.innerHeight - 50 - frameHeight;
    deadAnimation.visible = false;
    // 恐龙跳跃精灵
    jumpSprite.x = 60;
    jumpSprite.y = window.innerHeight - 50 - frameHeight;
    jumpSprite.visible = false;

    // 移除开始游戏的点击和触摸事件监听器
    hintsText.interactive = false;
    hintsText.off("click");
    hintsText.removeEventListener('touchstart', playGame);

    // 可以考虑在这里添加一个小延迟再添加跳跃的事件监听器,以避免立即触发跳跃
    setTimeout(() => {
        window.addEventListener("keydown", (e) => {
            if (e.code === "Space") {
                jump();
            }
        });
        app.view.addEventListener('click', jump);
        app.view.addEventListener('touchstart', jump);
    }, 100); // 延迟 100 毫秒添加跳跃事件监听器

    isGameing = true;
}
跳跃逻辑:
function jump() {
    if (isGameing && !jumpSprite.visible) {
        runAnimation.visible = false;
        jumpSprite.visible = true;
        jumpVelocity = 1200; // 确保每次跳跃前都重置了跳跃速度
    }
}
实时控制游戏逻辑:
app.ticker.add((delta) => {
    if (isGameing) {
        hintsText.text = "得分:" + score;
        // 获取自上一帧以来的秒数
        let deltaTime = app.ticker.deltaMS / 1000;
        // 计算基于时间的移动距离
        const groundSpeed = 1000 * deltaTime * Math.log10(10 + score);
        const cactusSpeed = groundSpeed;
        // 地面精灵
        groundSprite.tilePosition.x -= groundSpeed;
        // 仙人掌精灵
        cactusSprite.x -= cactusSpeed;

        if (cactusSprite.x <= -30) {
            cactusSprite.x = getRandomInt(window.innerWidth, window.innerWidth * 2);
            score++;
        }

        if (jumpSprite.visible) {
            // 根据deltaTime调整跳跃速度和重力
            jumpVelocity -= gravity * deltaTime; // 跳跃速度随时间减小
            jumpSprite.y -= jumpVelocity * deltaTime; // 根据跳跃速度更新位置

            // 检查是否落地
            if (jumpSprite.y >= window.innerHeight - 50 - frameHeight) {
                console.log("跳跃结束");
                jumpSprite.y = window.innerHeight - 50 - frameHeight; // 确保不会穿过地面
                runAnimation.visible = true;
                jumpSprite.visible = false;
            }
        }

        // 判断跳跃精灵与仙人掌精灵是否碰撞
        if (
            jumpSprite.y > cactusSprite.y - 60 &&
            jumpSprite.x + 60 > cactusSprite.x &&
            jumpSprite.x - 60 < cactusSprite.x
        ) {
            // 游戏结束
            gameOver();
        }
    } else {
        return;
    }
});
游戏结束逻辑:
function gameOver() {
    console.log("游戏结束");
    // 游戏结束
    isGameing = false;
    deadAnimation.visible = true;
    runAnimation.visible = false;
    jumpSprite.visible = false;
    hintsText.text = "游戏结束,最后得分:" + score;
    hintsText.interactive = true;
    hintsText.on("click", () => {
        location.reload();
    });
    hintsText.addEventListener('touchstart', function (event) {
        location.reload();
    });
}演示(emmm 手机上玩起来适配还不是很好……)